
Group Maintenance
Groups are a way of grouping members together for communication and organization. They give the Pastor and parish staff a quick way to reach out to parishioners. Some examples of groups include Bible Study Groups, Eucharistic Ministers, Finance Council, and Lectors. To get to Group Maintenance, you'll want to go to Groups > Group Maintenance through the blue navigation bar at the top of your screen.
IN THIS ARTICLE:
New Group
To create a new group:
1)Click New Group found in the top-left of your screen.

2) A pop-up form will appear.

Enter the Group Name and Group Description. These two fields are typically the same.
Note: The Group Description is required when the group is used in the Schedules module. If you leave this field blank, then Group Description will be blank when you generate the grid and schedule.

The Yes / No drop-down is used to signify whether or not this Group will be used in Ministry Scheduling.
3) Click Save. The Group is now created and will appear in your Group Maintenance screen.
Note: You are able to change the Group Information at any time by selecting the Group Name from your Group Maintenance screen.

Then, open the Group Information tab and edit what you desire. Remember to click Save.

To delete a group, select the Delete button that's shown in the screenshot above.

Adding and Deleting Members to/from Groups
You can add and delete members to/from groups via the Member Records or Group Maintenance.
Important Note: Only members with a Member Status of Active are able to be added to groups.
Tip: If you are adding or deleting group members in bulk, the quickest way to add them is through the Group Maintenance. This is because you avoid having to search for each individual member.
Through the Member Record
To add or delete members to/from the group through the Member Record:
1) Click on Families via the top navigation bar and select Member Explorer. Search for the member you wish to add or delete to/from a group, and open up their record.

2) Select the Groups tab within the Member Record. If you wish to add a member to a group click New Group and follow Step 3 below. If you wish to delete a member from a group, scroll to Step 4 below.

3) A pop-up screen will appear. Select the Group that you wish to add the member to, and add data to the additional fields if necessary. Click Save.
Note: You are not able to create new groups from this screen. You are only able to add members to groups which have already been created.

Group shows you a list of Groups that are already created.
Note: A parish/diocese can setup a Group Attribute type Position. If these positions are added as an attribute, then the list of positions will show in the drop-down menu as shown in the screenshot below. This will allow for consistent entries of positions across all groups. For example, Vice President can be added as VP, V-President, or Vice President. To prevent multiple position names from occurring we suggest you add your positions under the Attributes Tab.
Please click HERE to read more about setting up attributes.

Start and End Date is used to indicate a member's term on a group.
Preferred Service, Family Schedule, Month Week, Max Per Month are fields tied to the Schedules Module. If this is a Member/Group that will be used in the Schedules module please refer to this solution article that will explain how the fields are used.
Year is used to define the year the member joins the group. This will help to track how long a parishioner has been on a group.
4) To delete a member from a group, simply select the Delete button next to the group you wish to delete the member from.

Through the Group Maintenance
To add and delete members to/from groups via the Group Maintenance:
1) Click on Groups via the top navigation bar and select Group Maintenance.
2) Select the group by clicking on the group name where you wish to add, edit, or delete members.
3) The Member tab will appear when you open the Group (see screenshot below). To add a member, begin typing either the First or Last name and select the member from the drop-down. You may need to fill in the remaining fields depending on the group you are adding the member to (refer to Step 3 in the section above). Remember to Click Save.

To edit a member's group record, select View next to their name. Similarly, to delete a group member from the group, select Delete next to their name.
Send Message
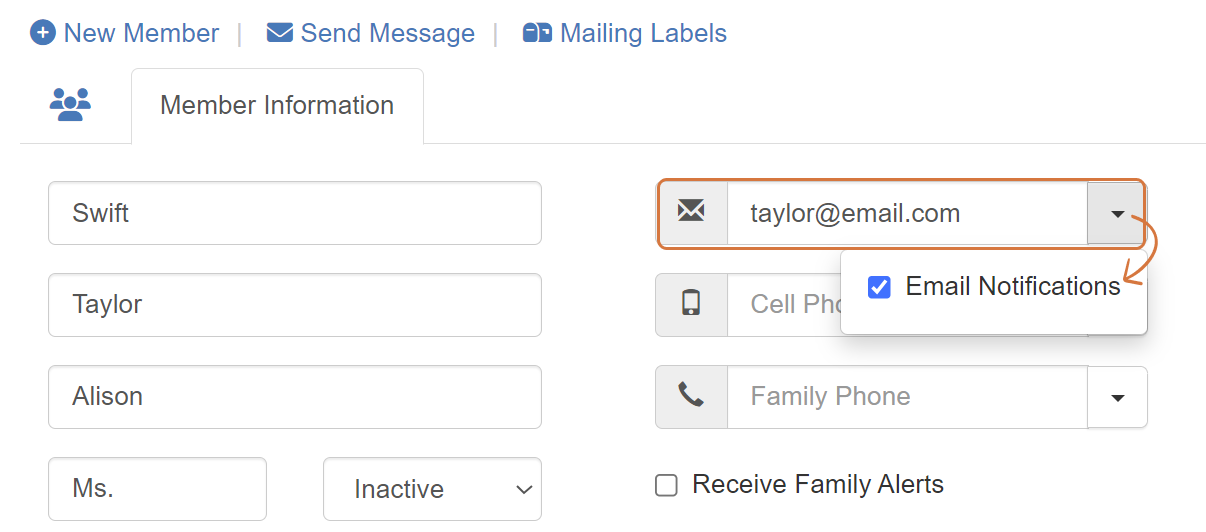
In order for members to receive messages that are sent through the Groups module, they must have their Member Email Notifications box checked, and a valid member email address listed.
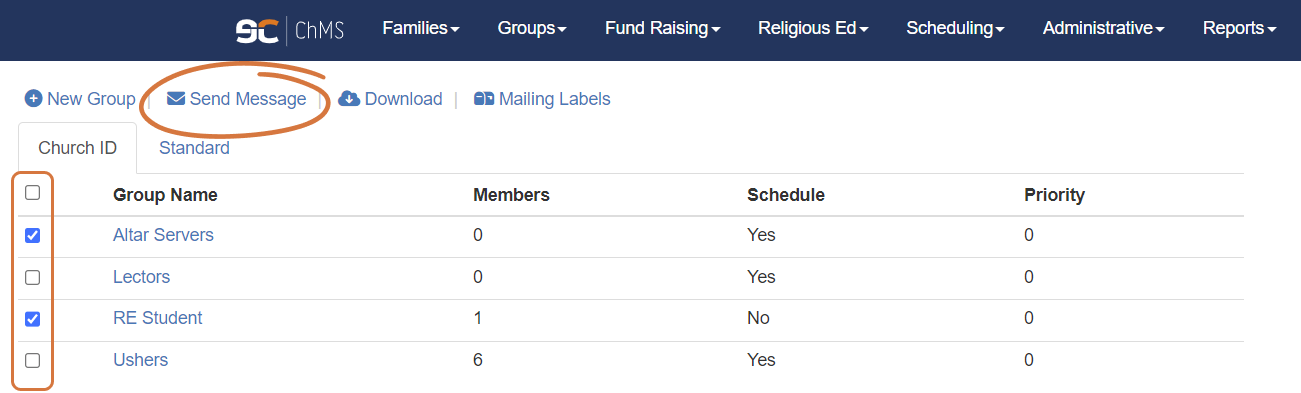
To send a message to all members in your groups, check the box next to the Group Name heading.

To send a message to one group or multiple groups, first check the box(es) next to the group name(s), then select Send Message.
Note: You can also send a message from within the group itself. You'll want to open up the group by clicking the group name. To send a message to all group members within the specified group, check the box next to the Full Name heading. To send a message to specific group members, check the box(es) next to their name(s), then select Send Message.

Download
The boxes as described in the Send Message section above will work in the same manner for Downloading. The only difference is that you'll want to select Download rather than Send Message.

After you click Download, a pop-up box will appear. The dropdown allows you to download the file as a .csv or a .xlsx. (A file downloaded as a .xslx will allow you to format your download as a table and it will keep this format.) The default name of the downloaded file will be "groups". You have the option to rename the file prior to actually downloading it.
