
Generating the Schedule (Step 5)
The schedule can be generated using the "1-Step Process" or the "2-Step Process". Either option will allow you to add manual assignments, but it's recommended to use the 2-Step Process if you plan on manually assigning anyone to the schedule.
IN THIS ARTICLE:
Important Notes: There are a few important things to be aware of before you go to generate the schedule.
- Service Weeks in eCatholic ChMS are on a Saturday through Friday basis. Because of this, when you go to generate the schedule, you want the Start Date to be a Saturday, and the End Date to be a Friday. This will ensure you are grabbing the whole weekend.
- When you create the schedule and members are assigned to serve, eCatholic ChMS automatically adds a busy week for the members that are scheduled to serve. For instance, if John Smith gets assigned to altar serve on 04/16/2023, he will automatically have a busy week added for "Altar Server" (assuming this is what you name the group) for 04/16/2023.
- This is important to keep in mind because the ChMS won't automatically assign someone if they have a busy week. Therefore, if you go to generate the schedule again, and you use different Start and End dates, the ChMS will see that John has a busy week on 04/16/2023 and will not assign him.
- Therefore it's important that if you need to generate the schedule again, you will want to choose the same Start and End dates, as you did the first time around. This will allow the ChMS to override the busy weeks that were automatically added when you first generated the schedule.
Generating the Schedule
1) Navigate to Schedules and select Generate Schedule.
2) You will see a pop-up appear. As noted above, your Start Date should be a Saturday, and your End Date should be a Friday.
1-Step Process
If you are doing the 1-Step Process, simply enter your dates, check the boxes next to "Generate Grid" and "Assign Members To Grid", then click Save.

Your schedule will be created and members will automatically be assigned to the scheduling groups.

You're able to edit any of these assignments afterward if needed. Please see Section 2 below to learn how.
2-Step Process
If you're doing the 2-Step Process, you'll want to enter your Start and End Dates, then only check the box next to "Generate Grid", and click Save.

This will generate the schedule, but the ChMS will not assign any members to the schedule. At this point you'd want to manually assign members to the schedule as described in Section 2 below.


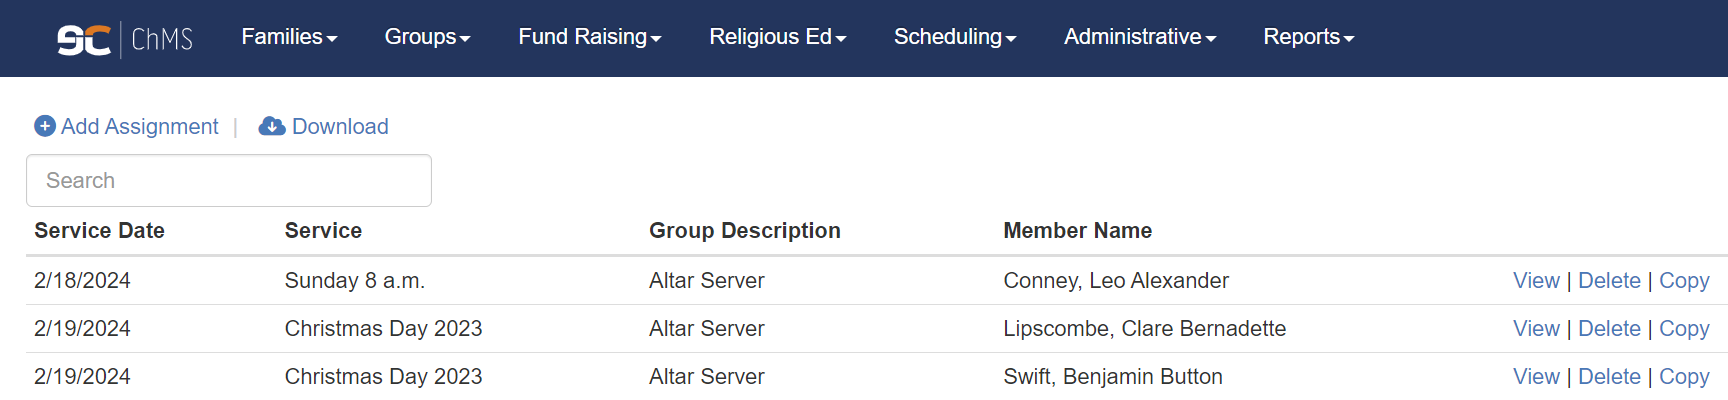
Once you've manually assigned any members to the grid that you'd like, you can go back to Schedules > Generate Schedule, then enter the same Start and End Dates, only check the box next to "Assign Members to Grid", and click Save.

You'll notice in the screenshot below that the ChMS then automatically assigned members to any of the open positions, but retained any members that we manually assigned.
Adding, Editing, and Deleting Members from the Schedule
Please read the following to see how you can add, edit, or delete members from the schedule:
Adding an Assignment
You can add an extra assignment to your schedule for a particular service if you'd like.
1) You can do this right after generating the schedule, or by going to Schedules > View Schedule.
2) Select Add Assignment found in the top-left of your screen, then you'll see a pop-up appear. Select a Service Date, Service, Scheduling Group, and the Member you want to serve, then click Save.

After you click Save, the extra assignment will be added to your schedule.

Note: After clicking Save, the assignment will initially appear at the top of your schedule. After you refresh your page, it will then fall in place according to the date, service, group description, and member name.
Editing an Assignment
Editing an Assignment allows you to assign or manually change who is serving.
Note: If using the 1-Step Process, you should do this after the schedule has been generated. If using the 2-Step Process, you should do this after generating the schedule, but before assigning members to the grid. (You can make any additional adjustments afterward if necessary.)
1) After you've generated your schedule, (or you can go to Schedules > View Schedule if needed), click View next to the assignment you wish to change or manually assign.

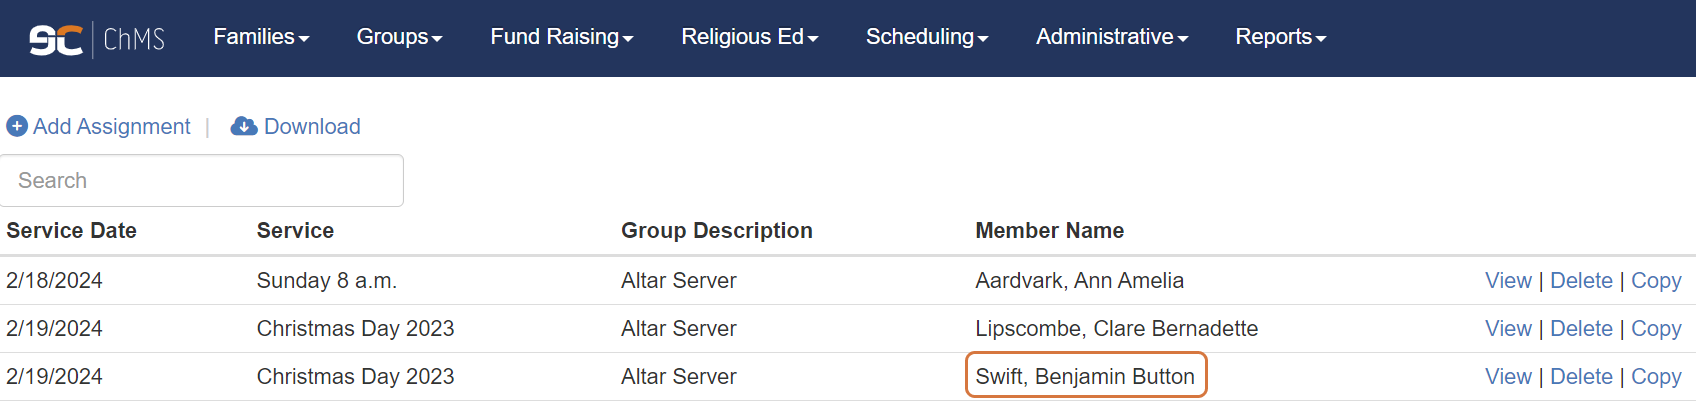
2) You'll see a pop-up appear. Now select the member you wish to manually assign, then click Save.

After you click Save, you'll notice that the change has been made.
Deleting an Assignment
1) You can delete an unnecessary assignment from your schedule by going to Schedules > View Schedule. Then, choose Delete.

2) A pop-up will then appear where you can confirm that you do want to delete the assignment by clicking Delete again.

Copying an Assignment
1) You can copy an assignment and then change the member assigned to serve if you'd like. You can do this right after generating the schedule, or by going to Schedules > View Schedule.
2) Select Copy next to the assignment you wish to duplicate.

3) The pop-up that appears is similar to the pop-up when Editing an Assignment. By copying an assignment, you are adding an assignment for the same Service Date, Service, and Group. You then need to select which member you want to serve, and click Save.


Note: Similar to when you add an assignment, after copying an assignment it will initially appear at the top of your schedule. After you refresh your page, it will then fall in place according to the date, service, group description, and member name.