
How to customize shared Facebook posts
When somebody shares a link to a page of your website on Facebook, the social network automatically grabs information (metadata) from the page.

Specifically, Facebook scrapes your page for the following metadata:
- An image
- A title
- A description
Facebook uses this metadata to make the link to your page more attractive and engaging in the Facebook newsfeed. You can easily customize these items (image, title, and description) on your eCatholic website to ensure that Facebook posts linking to your website look their best in the newsfeed. Here's how:
- 1
-
Turn on site-wide Facebook Share customizations

The first step is to adjust your site's Integrations & Social settings to allow Facebook Share customizations:
- Click on Admin in the Admin toolbar at the top of the page > Settings > Integrations & Social (Steps 1-3 illustrated above).
- Within the Integrations & Social tab, you'll find Customize posts shared to Facebook. Make sure it is set to ON (Step 4 illustrated above).
- Click Save/Publish (Step 5 illustrated above).
Now, you will be able to adjust the image, title, and description pulled by Facebook for individual pages of your website.

- 2
-
Add a default site-wide Facebook Share Image (optional)
In addition to making page-by-page Facebook customizations, you can add a “Default Facebook Share Image.” Uploading a default image ensures that all of your website’s URLs shared on Facebook include an image, regardless of whether that specific page has been customized with Facebook sharing settings.
NOTE: All Facebook Share Images will be cropped to 1200 x 628 pixels. - Click on Admin in the Admin toolbar at the top of the page > Settings > Integrations & Social.
- Within the Integrations & Social tab, you'll find Customize posts shared to Facebook. Make sure it is set to ON, then click +Add Image.
- Either upload an image or select an image from your site's File Manager.
- Once your image has been uploaded/cropped, click Save/Publish.
- 3
-
Enter Facebook metadata for specific pages
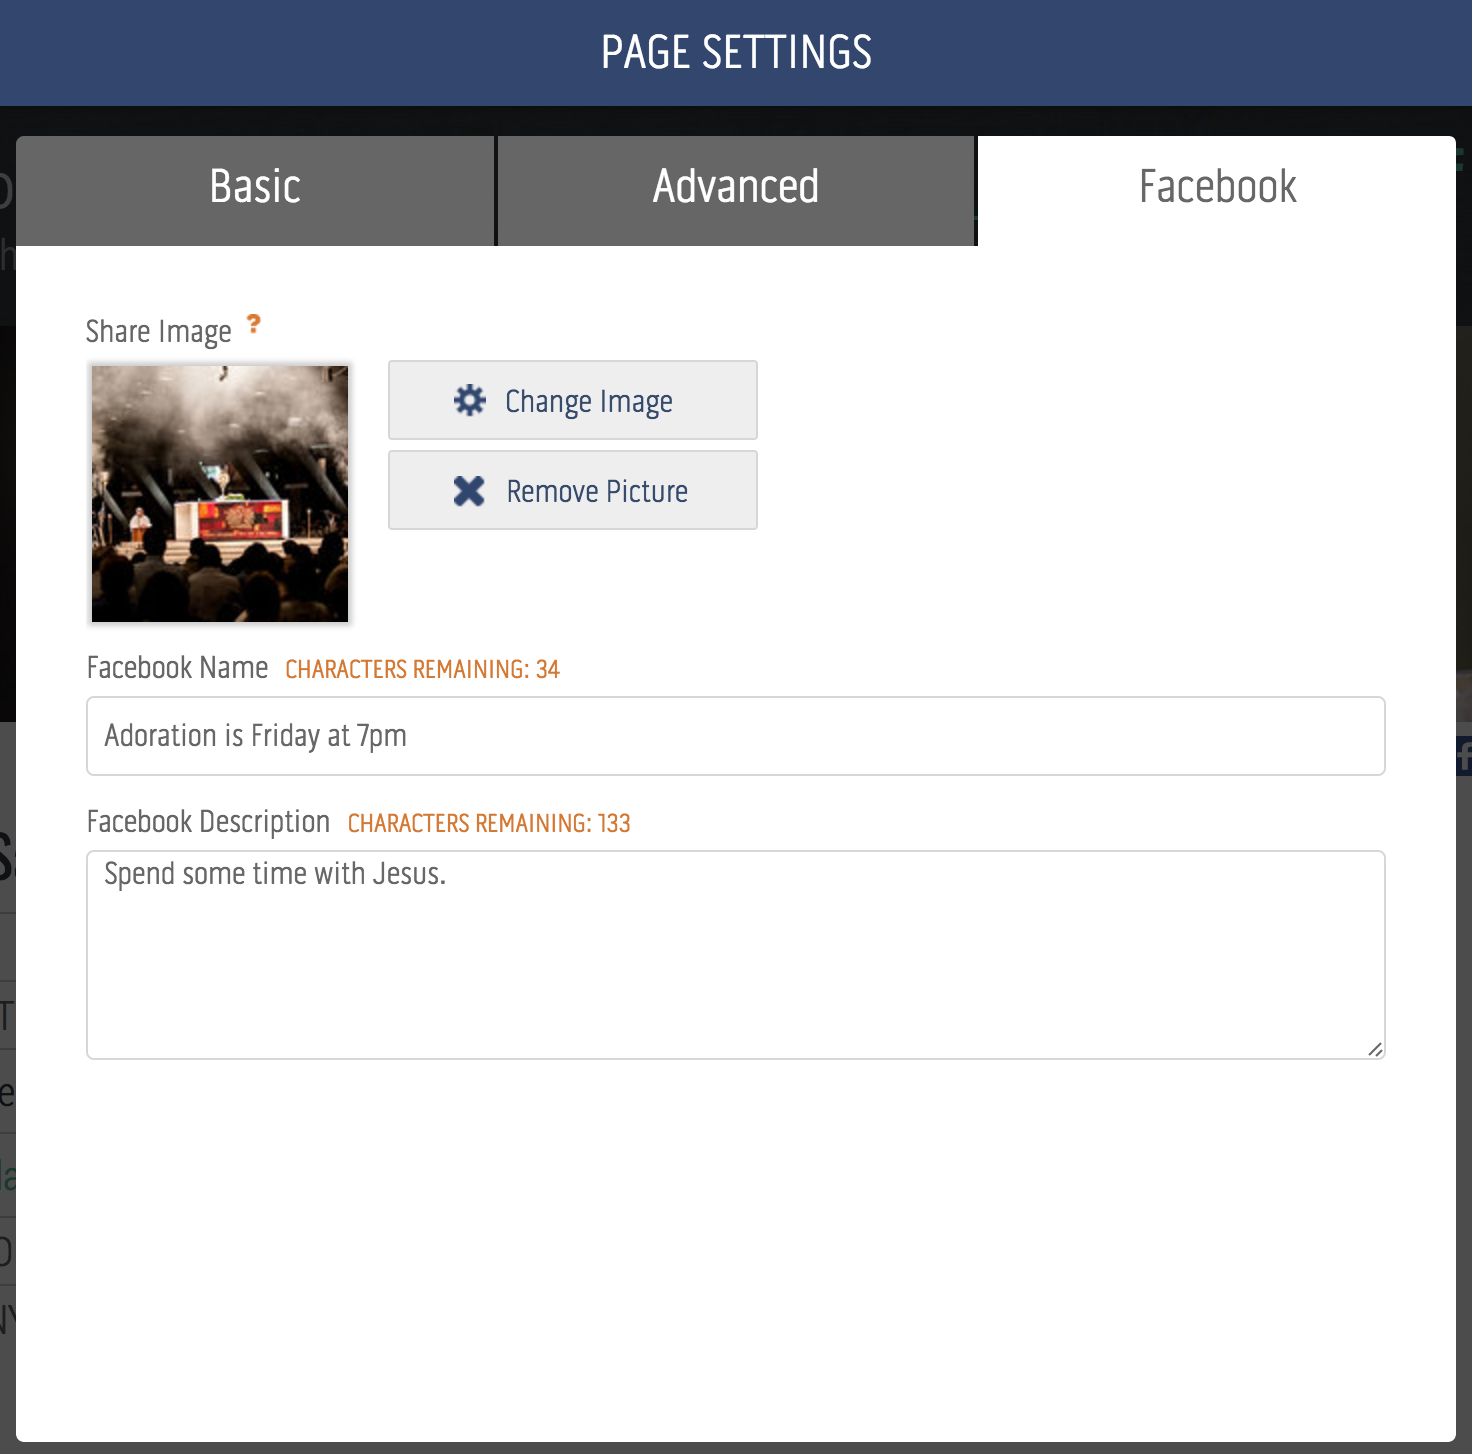
Once you've picked a page you’d like to customize, navigate to the page and access the Page Settings. Then, locate the Facebook tab, which is where you can:
- Upload a Share Image (Needs to be at least 1200 x 628 pixels in size)
- Enter a Facebook Name (Keep it under 60 characters to ensure it won’t be cut off in the Facebook newsfeed)
- Enter a Facebook Description (No more than 160 characters)
Click Save after you've entered the appropriate information.


Facebook Debugging & Scraping
If you tried testing your newly customized page’s URL in Facebook and aren’t getting the expected results, have no fear. It may be necessary to debug your page and have Facebook scrape the URL again.
Facebook’s Sharing Debugger is a tool that allows you to preview exactly how your shared URL will look on Facebook. Go to the sharing debugger, paste your URL, and click debug. If you’re not seeing the newly customized data you just published on your eCatholic website, click “Scrape Again.” The appropriate information should now be pulled.

How to build a Facebook strategy that actually works
Does it seem like the content you publish on your Facebook page seems to get lower and lower organic reach with each passing day? Check out our webinar: How to build a Facebook strategy that actually works.