Generating Mailing Labels from the Excel Download

This article will explain how to generate mailing labels from FamilyMember, and Group records.

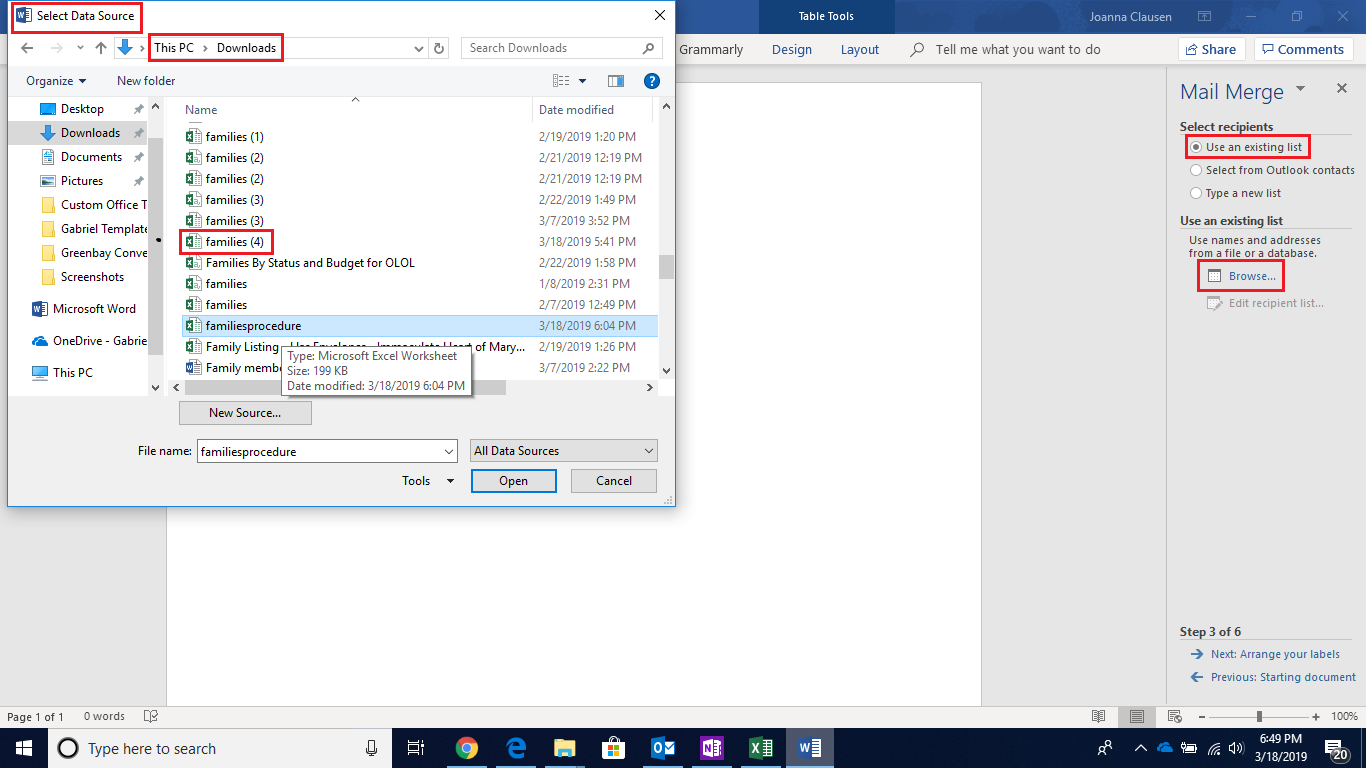
Generating The Data Source

The first step in generating mailing labels is to generate the data source by downloading the FamilyMember, or Group records. Click here to learn how to do this.

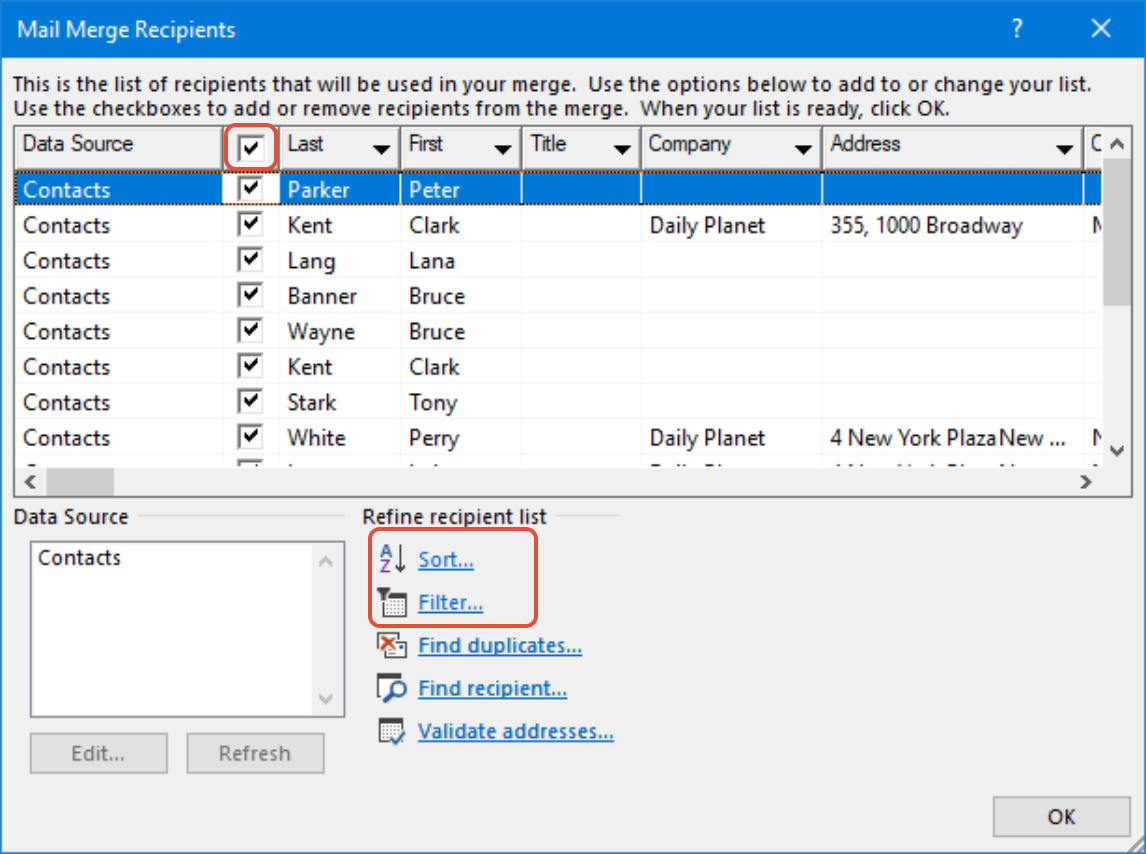
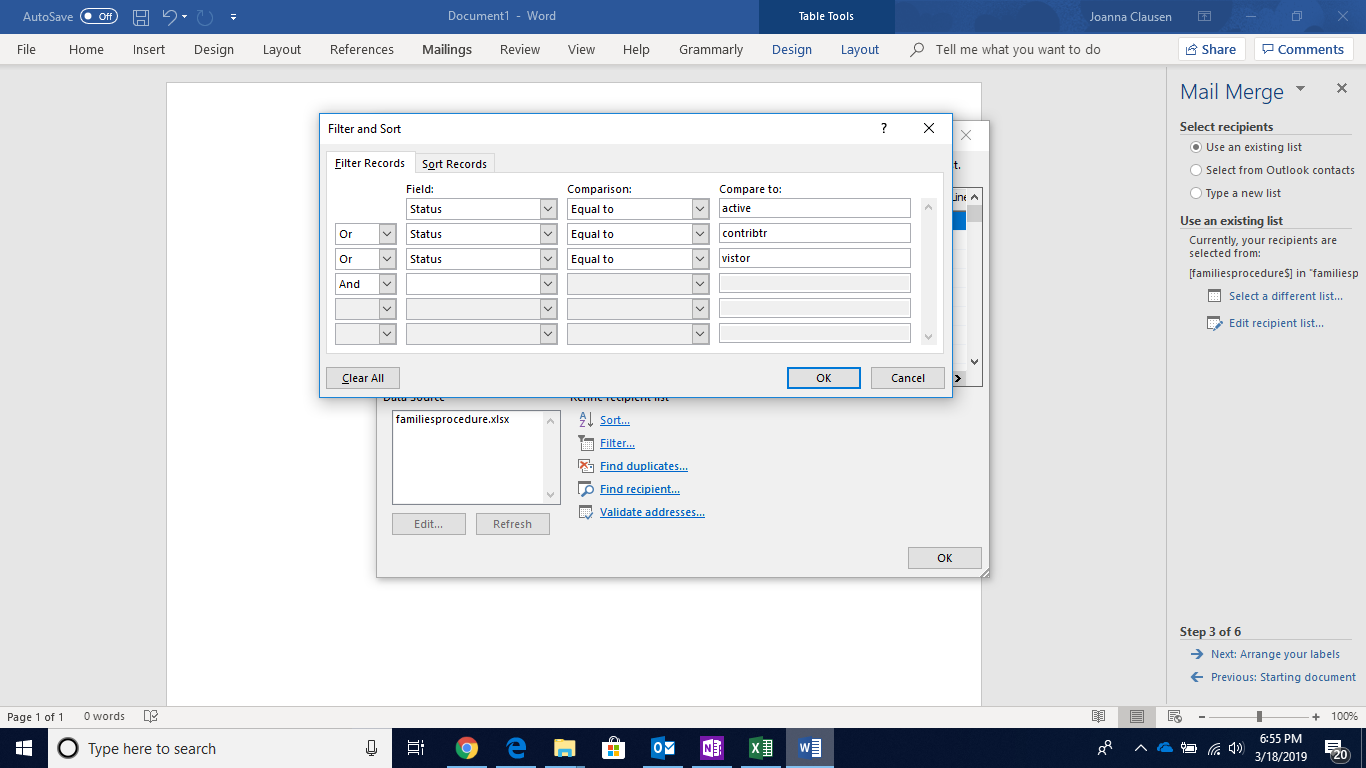
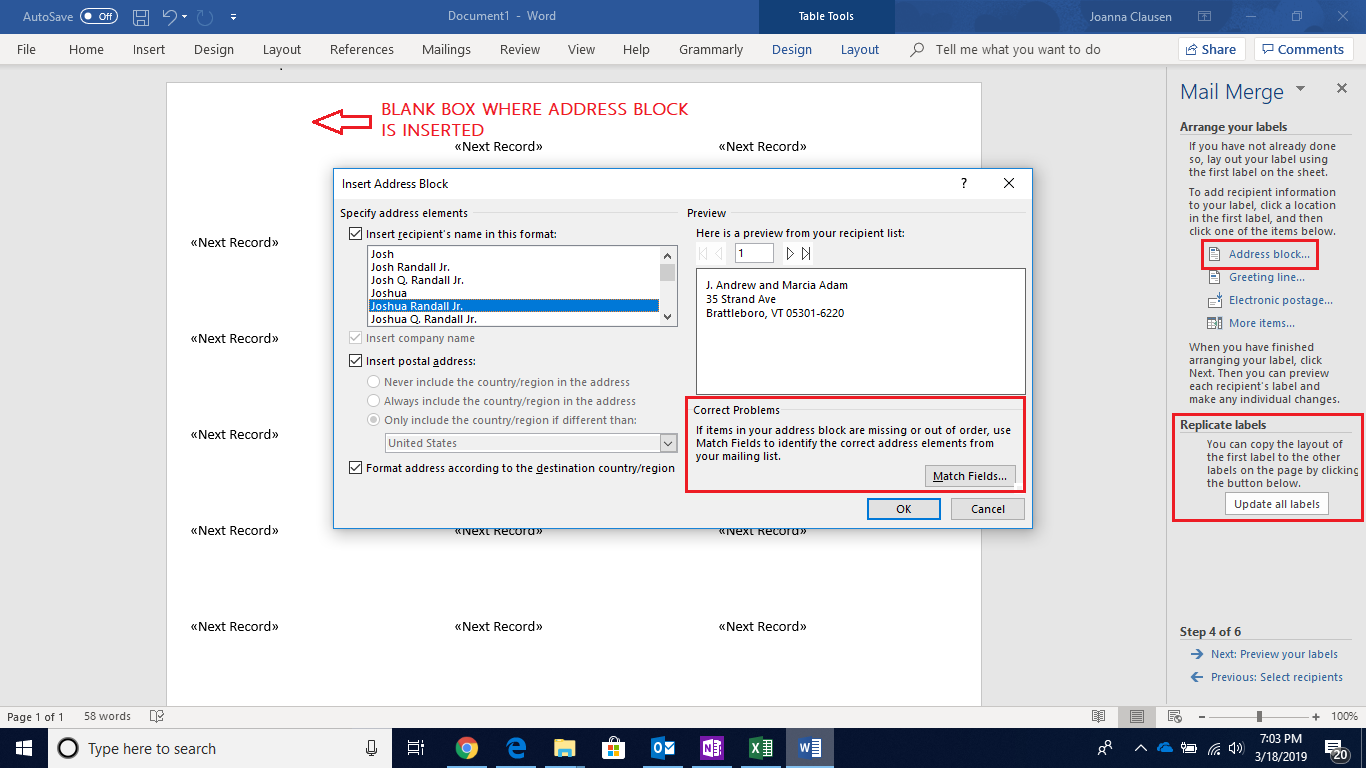
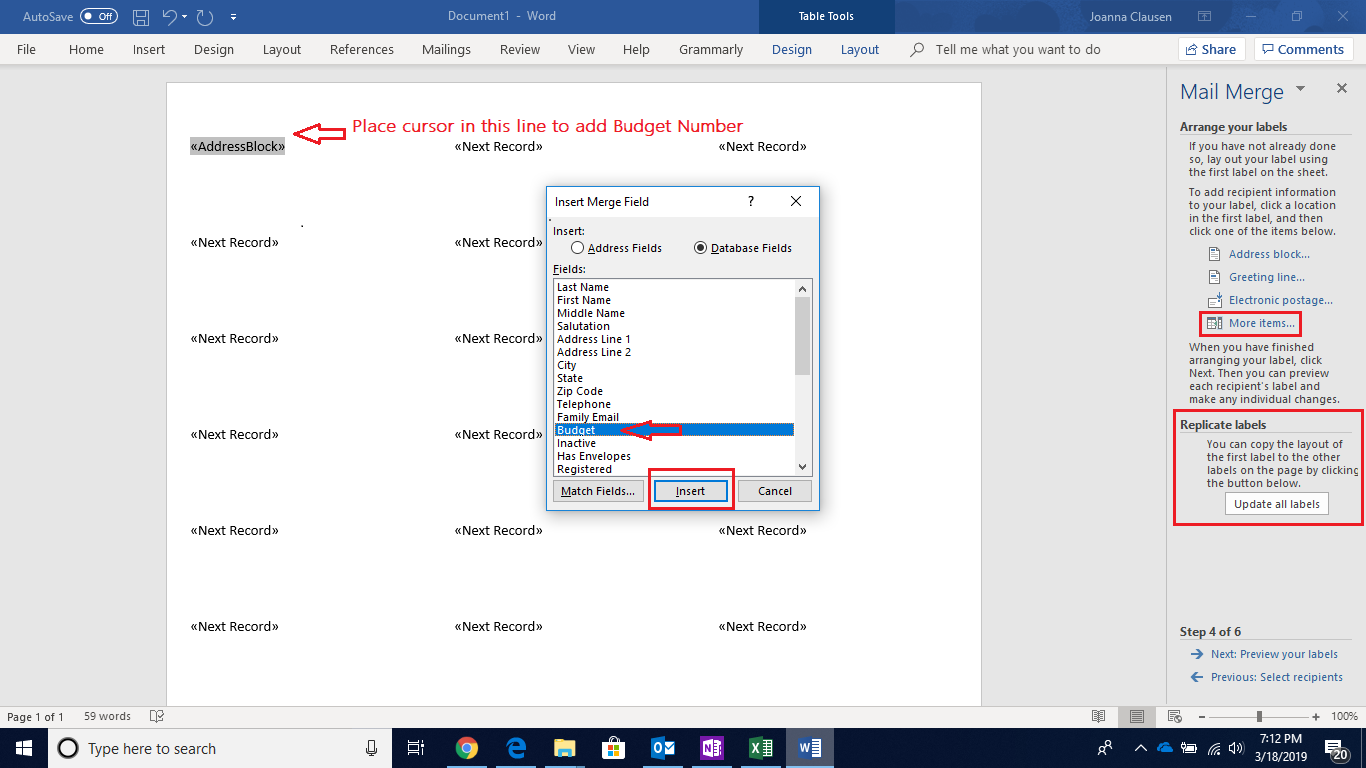
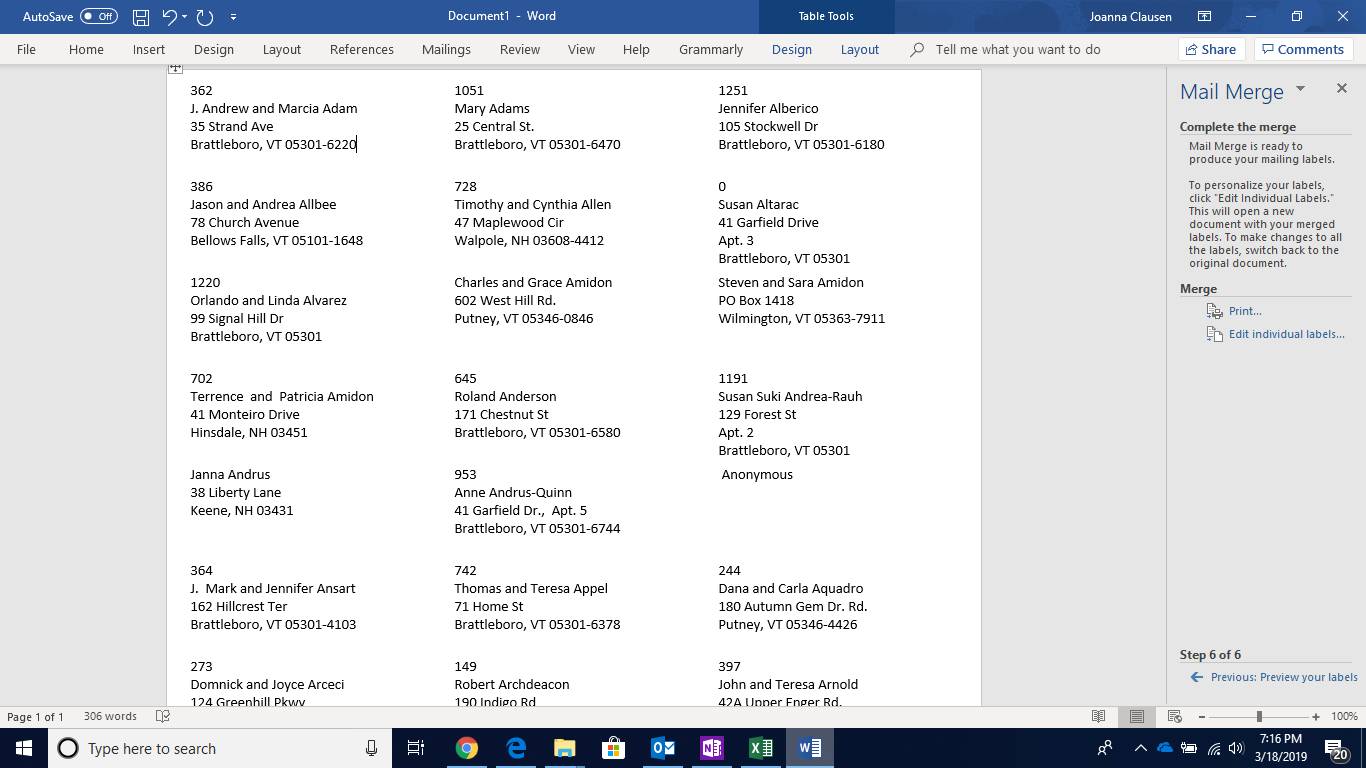
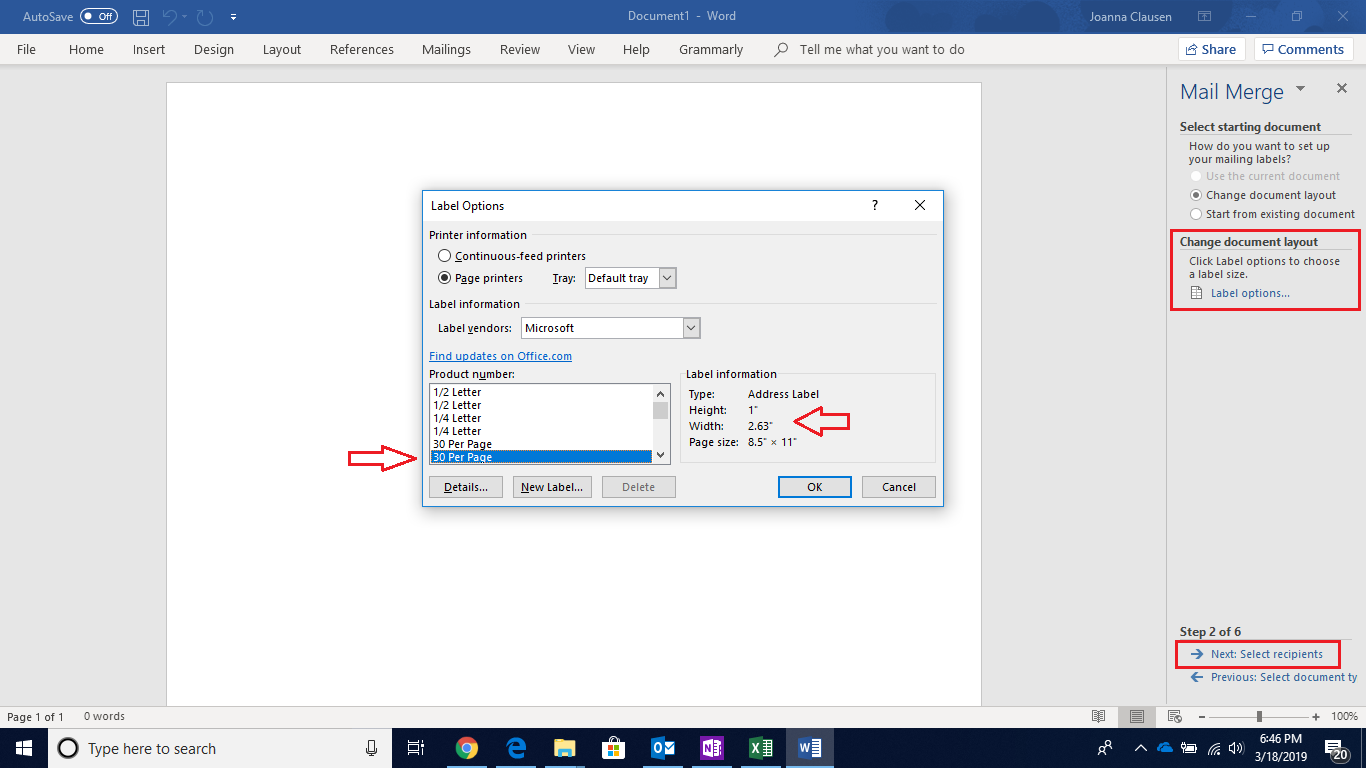
Microsoft Mail Merge To Create Labels

1
Open a new Word document. Be sure it is set in Portrait mode.
2
 Go to  Mailings and select  Step by Step Mail Merge Wizard from the Mailings drop-down menu as shown below. The Mail Merge wizard will open a window on the right. 
3
Click on the Labels button. Go to the bottom of the Mail Merge box and click Next: Starting document.
4
Go to Label Options and a label option box will pop-up. Select 30 per pageand be sure to select the label that has the height of 1" and the width of 2.63" on 8.5" x 11" page size. This is the standard 30 per page label. Next: Select Recipients.
5
Now you are going to select your Data Source document that you downloaded from Family, Member, or Group records. This is the file that contains the Family or Member names and addresses that you will be using to create your mailing labels. You are going to use an existing document and you will click on Browse... A select data source box will pop-up. You will now have to locate where you saved the file and you will have to know the name of the file you are looking for. Once you find it and select you will click Open.

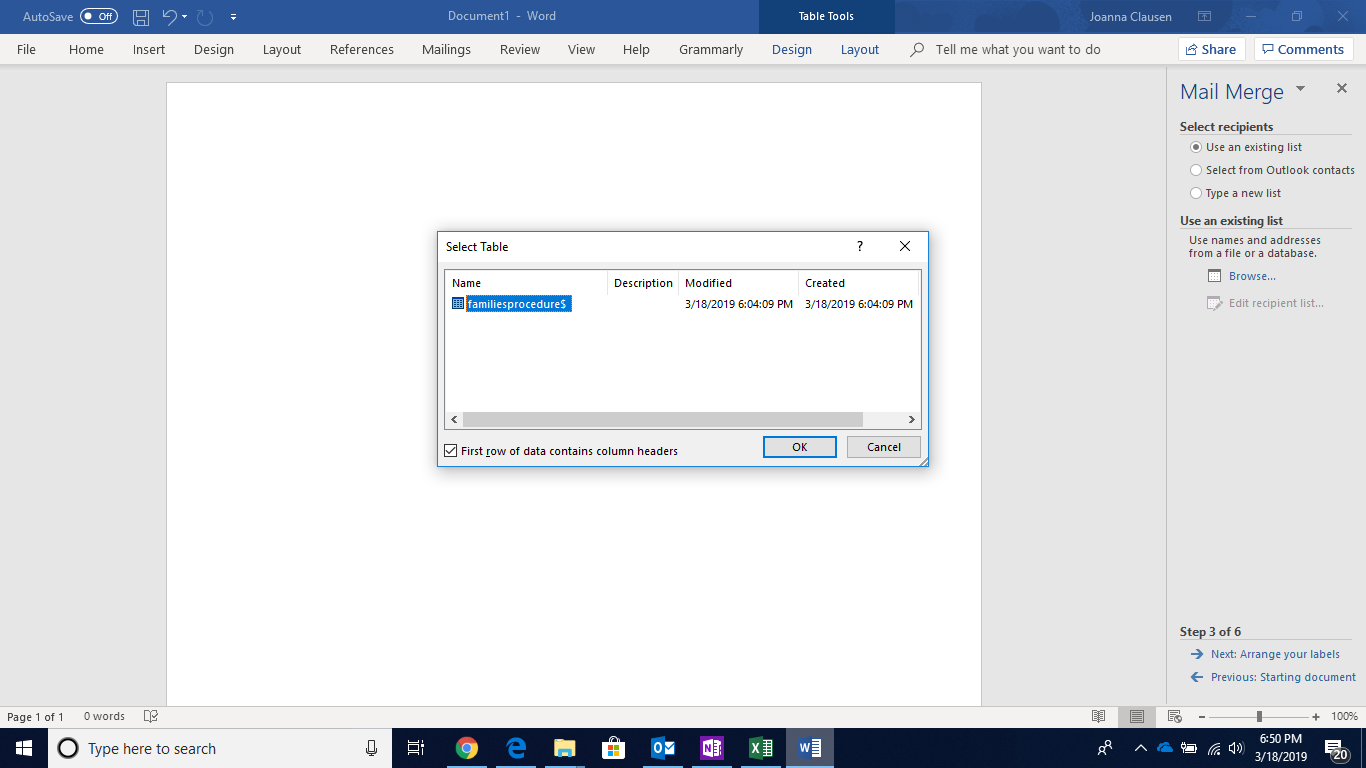
Note: If you are using the Member download you will look for the name members and if you are using the Group member download you will look for groups report.

6
If a Select Table box appears, be sure the correct table (Excel file) is selected and click OK.
7
A Mail Merge Recipient List will pop-up. If you did not sort your file when you downloaded this is where you can refine your search and select only those who you want to create mailing labels for. If you want to filter out certain parishioners click on Filter or Sort when the Mail Merge Recipient box pops up.
8
Click on Step 4 of 6 and arrange your labels. Be sure your cursor is set in the Upper Left Box (the blank box). Click on Address block and the  Insert Address Block will pop up.  
You can see in this particular example the label contains all the correct fields for a mailing label. If it was missing the address you would click on the Match Fields Box , select the field that was missing, and click OK. If your label looks correct hit OK and click the Update all labels box. If you do not hit this button and you go to the next step the remaining labels will not populate.
9
To add the Budget number to the mailing label, place your cursor in the first line prior to adding the Address Box. Then click More items. Select Budget and click insert. Move your cursor to the next line and click the Address Block. Click Update All Labels.
10
Complete the merge, which will create all your label. Click Edit Individual Labels. A merge to a new document box will pop up. Select All and hit OK. A new Word document has been created with all your labels. The final step is to Save As (name the file and be sure you know where you saved it). This label file has been permanently saved to your computer and you can edit it as you would any other Word file.

Still need help? Contact Us Contact Us