How to set up and design a page with a Sections layout
With eCatholic, you can easily use Sections layouts to design pages that contain a variety of individual content sections. Here's how to set up and design a page with a Sections layout!

Configure your site for sections-based editing
Before you actually design a page with a Sections layout, you must first configure the page to allow for sections-based editing.
Choose a compatible theme
Sections layouts are available in the free themes listed on our website and in your eCatholic website's Design Studio.
Learn more: Use these instructions to select one of the compatible themes in the Design Studio: Change your theme and color palette
- 2
-
Select a Sections layout
Once you've selected a compatible theme, next you must select a Sections layout. You can create a Sections layout in three different places: 1) on your homepage, 2) on a specific interior page, and 3) as the default layout for all interior pages on your website. Here's a breakdown for each of these options:
- Select a Sections layout on your homepage
- Go to the Design Studio.
- Click the Layouts button to browse all homepage layout options.
- Select a Sections layout.

Learn more: Change your homepage layout
- Select a Sections layout on an interior page
- Click Edit Website to access your site in edit mode.
- Navigate to the page on which you'd like to use a Sections layout.
- Click the Page Settings icon (located at the bottom left-hand side of the page next to the trash can button), then go to the Page Layout tab (pictured below).
- Select a Sections layout.

Learn more: Change the layout of an interior page
- Select a Sections layout as your site's default layout for interior pages
- Go to the Design Studio.
- Click the Interior Page Layouts button to browse all page layout options.
- Select a Sections layout.
Learn more: Change the default interior page layout for your entire site
Now that you've chosen a compatible theme and layout, it's time to actually design the page using sections.
- Select a Sections layout on your homepage


Design a page using sections
Once you've selected a compatible theme and a Sections layout as described above, you can begin to create sections (an example section is pictured below).

Navigate to the page you'd like to design. Then, use these instructions to build your page with sections:
- 1
-
Click on the + to add your first section
To begin, click on the + icon in the center of the page to add the first section to the page. This will open the Add Section dialog.
-

What is a section? A section is a horizontal region into which you can add modules (content) with unique layouts and design.

- 2
-
Select the Section Type
Once the Add Section dialog appears, select the section type you'd like to add. (e.g., Row, Columns, Buttons, etc.)

What are section types? For a detailed description of the different section types available, refer to Examples of different section types and how to use them.

Select the Section Layout
Each section type includes a variety of layout options. Click on the layout you would like to use for the selected Section Type. Then click Save to add the section to the page.

Add modules (content) to your section
When you return to the page, you'll either see 1) the empty section or 2) the section with pre-populated (i.e., suggested) content modules. The next step is to add content to the section.
• Adding content to an empty section
Click + Add Content to drag and drop modules into the empty content areas marked with a dashed outline (pictured below).

• Adding content to a section with pre-populated (suggested) content
Some section types (such as the Buttons and Side-by-Side section types, for example) are pre-populated with modules. For these section types, you'll add content to the modules as you normally would. (i.e., Click the Settings icon to create a button (pictured below) or insert a video; click inside a Text/HTML module to add/format text.)

Edit the section settings: Design & layout
Each section type includes editable design and layout options. To access these settings, hover your cursor over the section and click the Settings icon in the top right of the section (pictured below). This will open the Section Settings dialog.

- Styling - Choose a section background color, module background color, section shadow, and other styling options.
- Background Image - Click + Add Image to add a Background Image for the entire section.
- Section Height - Select Fixed to set a fixed section height. Select Auto to allow the section to automatically expand based on the contents of the modules you add to the section.
• Edit section design
Once the Section Settings dialog appears, use the Design tab to control the appearance of the section. Note that the available design options depend on the section type and the theme you are using. Here are a few of the most common section design options:

PRO TIP: Combine a custom background image with a section background color from the Styling menu to achieve a colored overlay for your image.
• Edit section layout
Use the Layout tab to adjust your previously selected Section Layout.

Once you have edited your section settings, click Save.
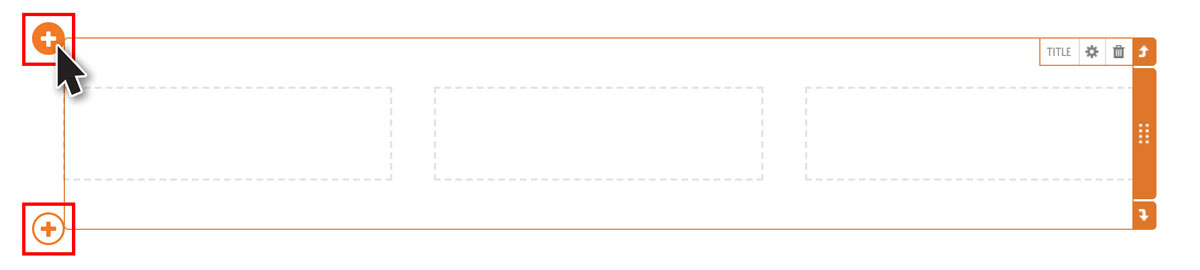
Add more sections to the page
To add an additional section to the page, hover your cursor over an existing section, then:
- Click the + icon on the top left to add a new section above the current section, or
- Click the + icon on the bottom left to add a new section below the current section.
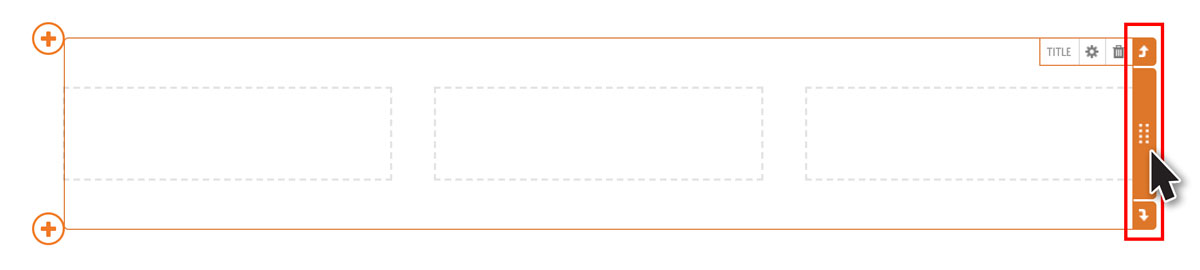
Arrange sections on the page
To arrange the order of sections on your page, hover your cursor over an existing section, then:
- Click the up arrow icon on the top right to move the section up one spot, or
- Click the down arrow icon on the bottom right to move the section down one spot, or
- Use the orange handle on the right edge of the section to drag and drop the section to a different location on the page.

Next step: View examples of different section types
See a breakdown of each section type and examples of how each can be used to achieve a beautiful, balanced page design. Go to Examples of different section types and how to use them.