How to import members from another system into Connect
If you’re already using a different communication system (or have your members’ names and emails stored elsewhere), you can easily import existing member data into Connect to get up and running quickly. Here is how:
In this article:
Preparing your import file
As a first step, prepare a CSV file that you will import into Connect.
Go to your existing communication tool or member database and export your member data as a CSV file.
Formatting your CSV file
The file you import into Connect should contain the following 3 columns:
- First Name
- Last Name
Each row should contain data for one member. i.e., One name, one email.
First Name and Last Name should be separate columns.

NOTE: You can download an example CSV file here to get started.
You may optionally include a 4th column for Phone. However, any imported phone numbers will merely be visible to organization admins when they view a member; Imported phone numbers will not subscribe that number to receive your text messages.
Starting your import
Once you have your import file (CSV) ready to go, it's time to complete your member import.
NOTE: Only Organization Admins can complete a member import
Log in to Connect and navigate to your list of Organization Members by clicking Members in the main navigation bar.
Then click the Imports tab and click the Import Members button.
The Import Workflow
1 - Upload your CSV file - Drop your properly-formatted CSV onto the screen. It is vital that your data follows the format listed above. First Name, Last Name, Email, Phone (optional) all in separate columns.
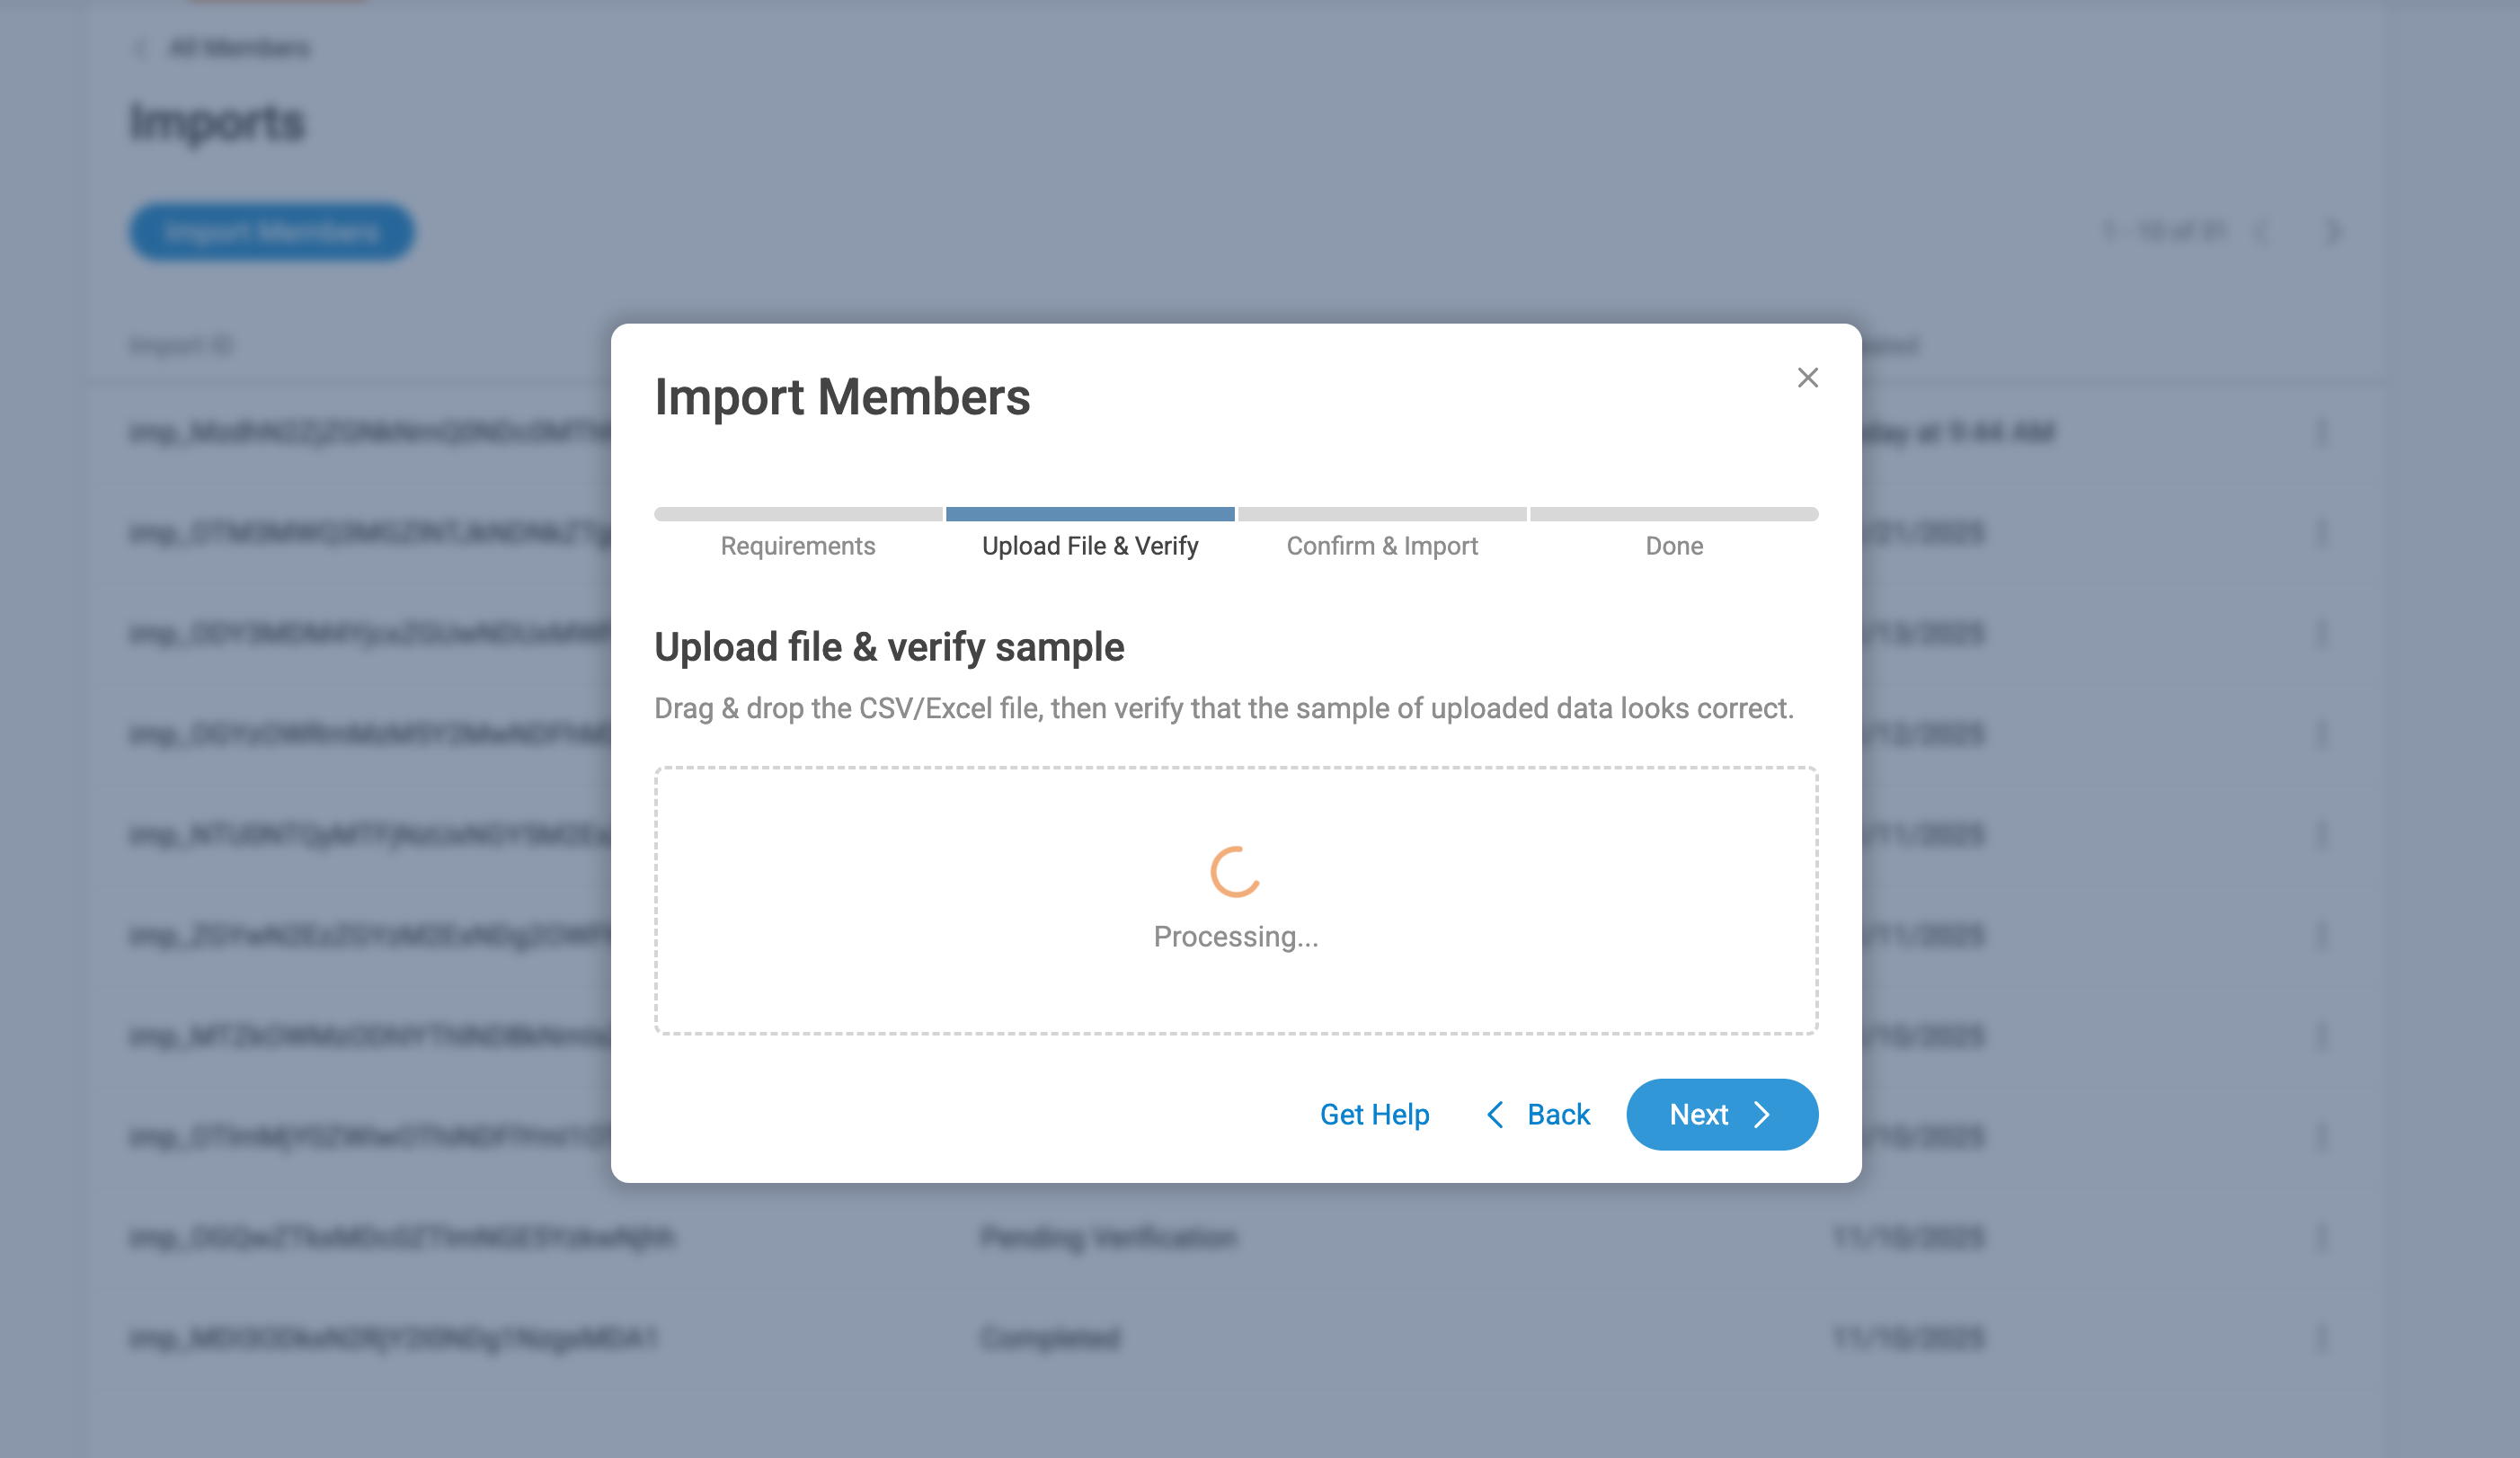
2 - Verify Data - After your file is uploaded, you will see a sample of how your data will look if you proceed with the import.
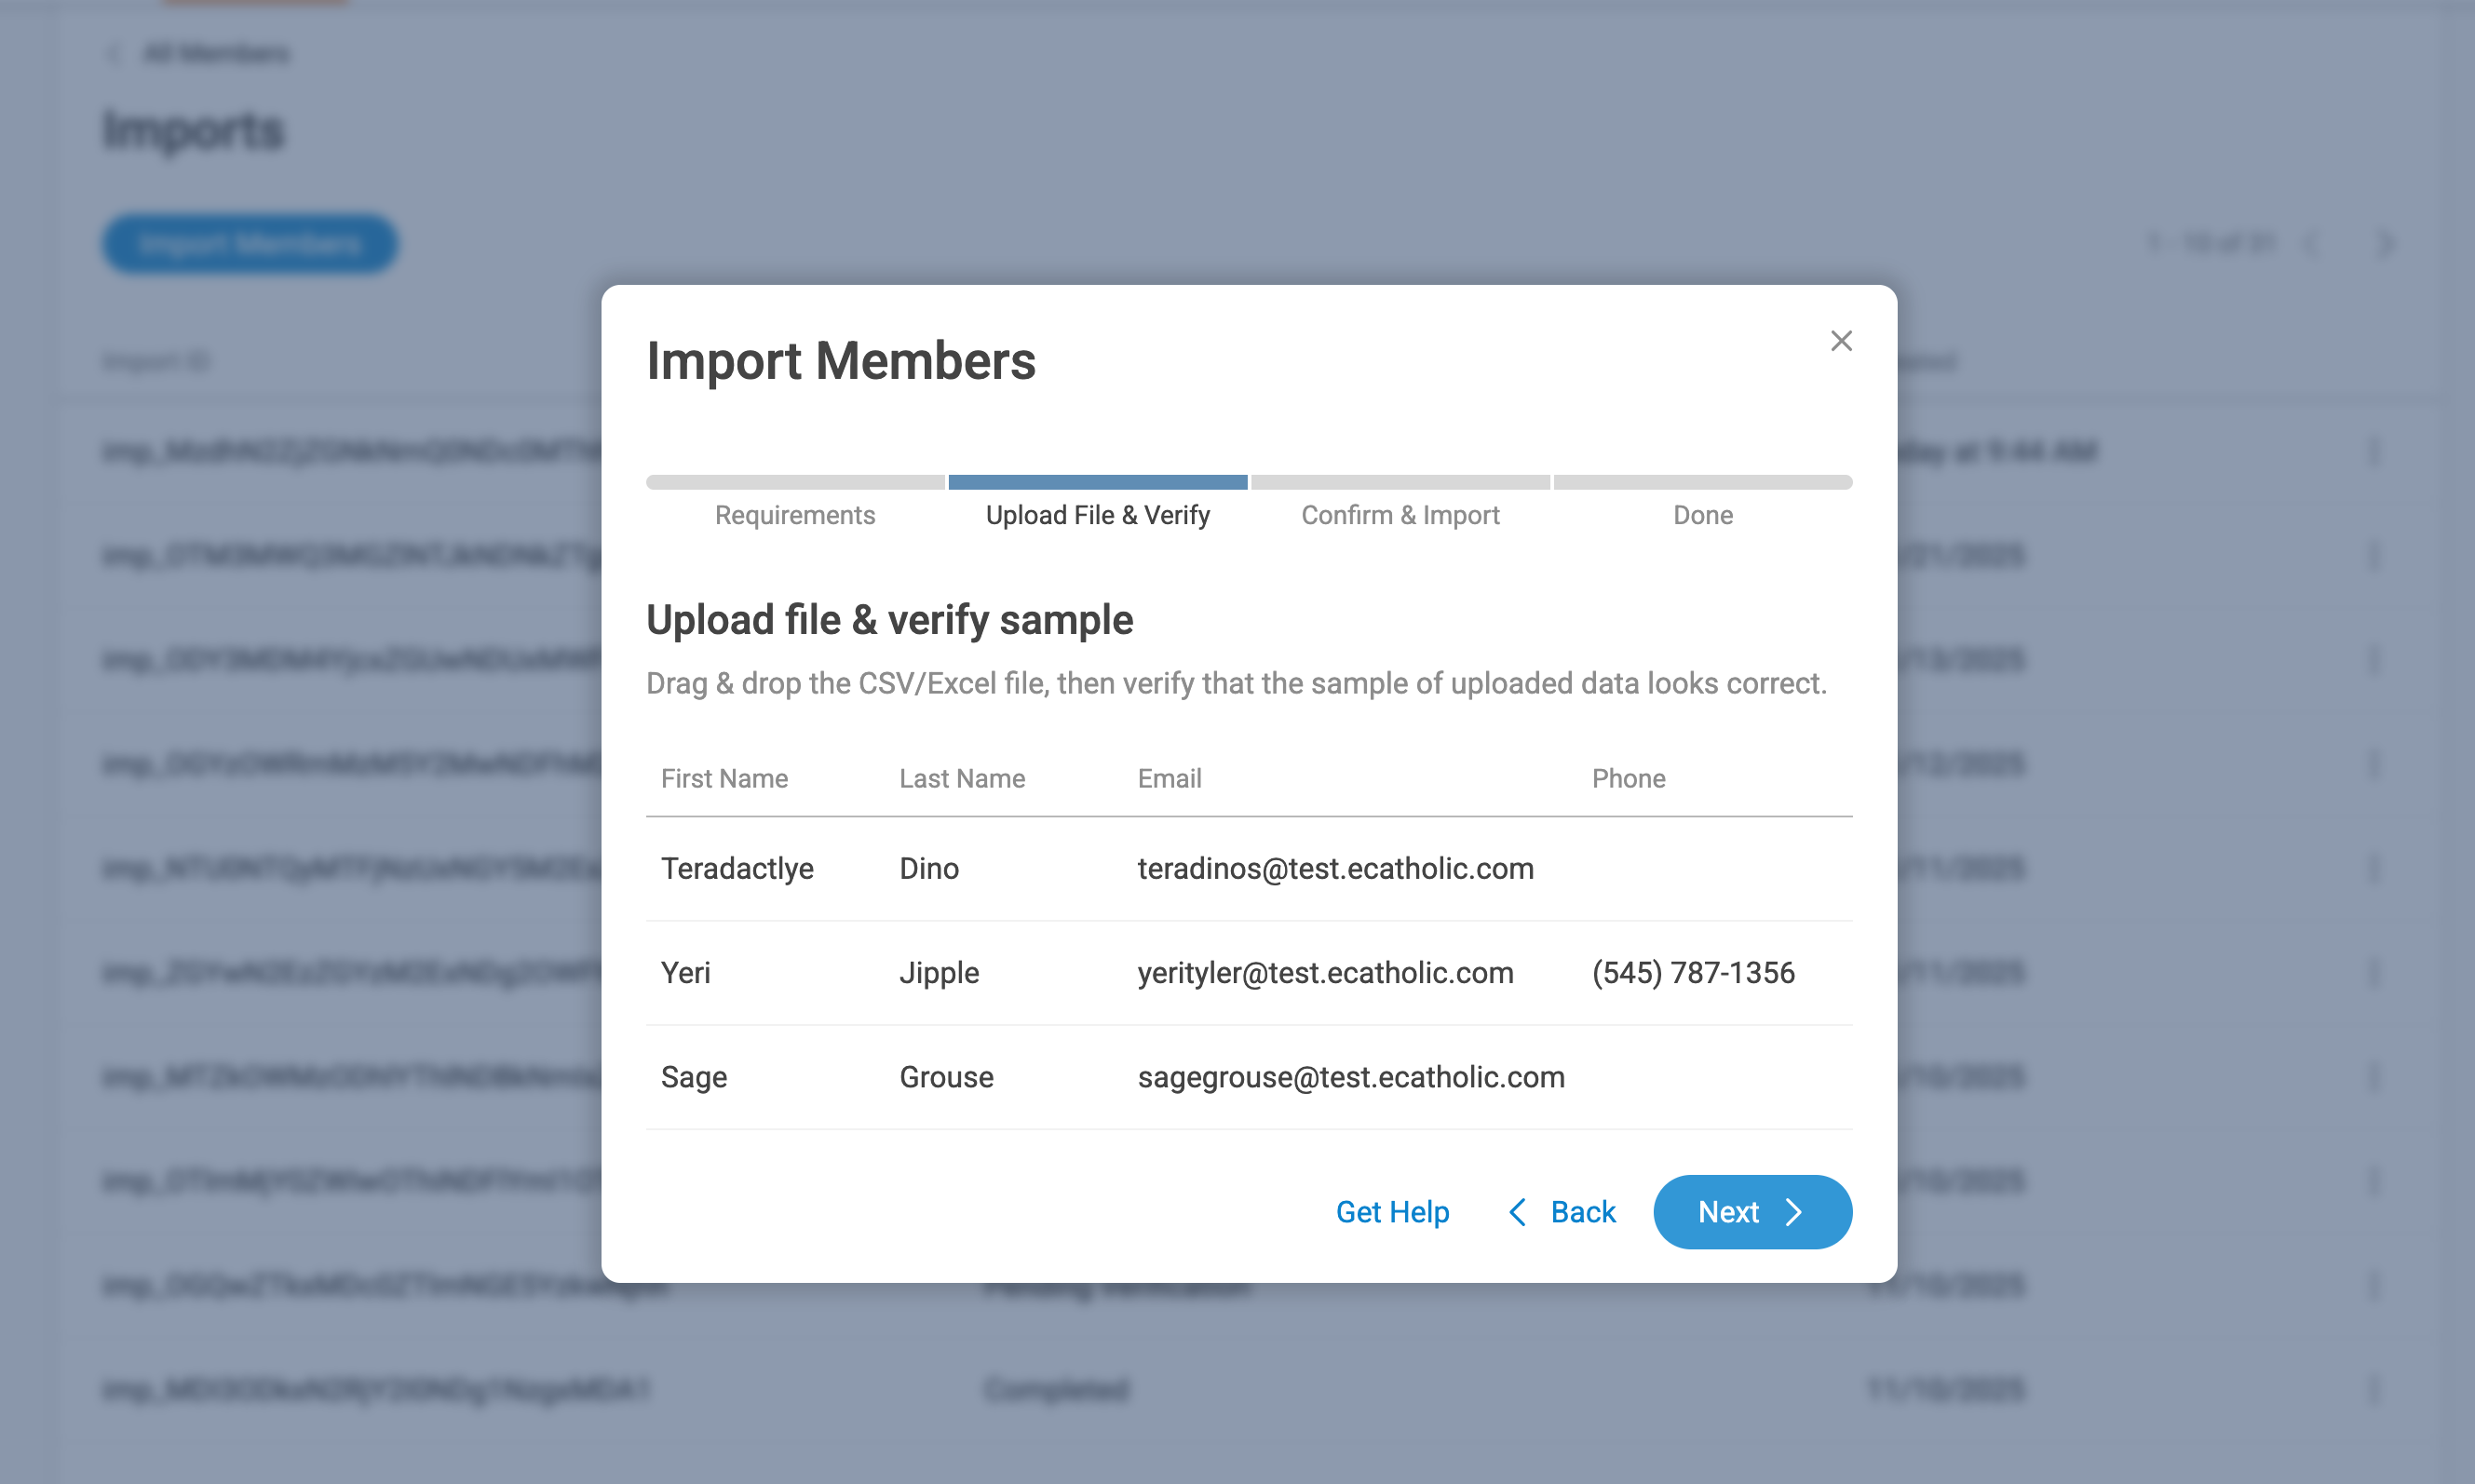
Important
Make sure the data lands in the appropriate columns and that everything looks correct. Once ready, click Next.
3 - Confirm & Import - After you’ve verified that your data looks correct, you will see a summary of your import details. The system will indicate:
- The number of records that will be processed
- Any records that will not be processed due to:
- Records that contain data that matches existing organization members (i.e., duplicates)
- Records that contain an error (such as an invalid email address)
If everything looks as you expect, select the "I have permission"… checkbox and click Import Members.
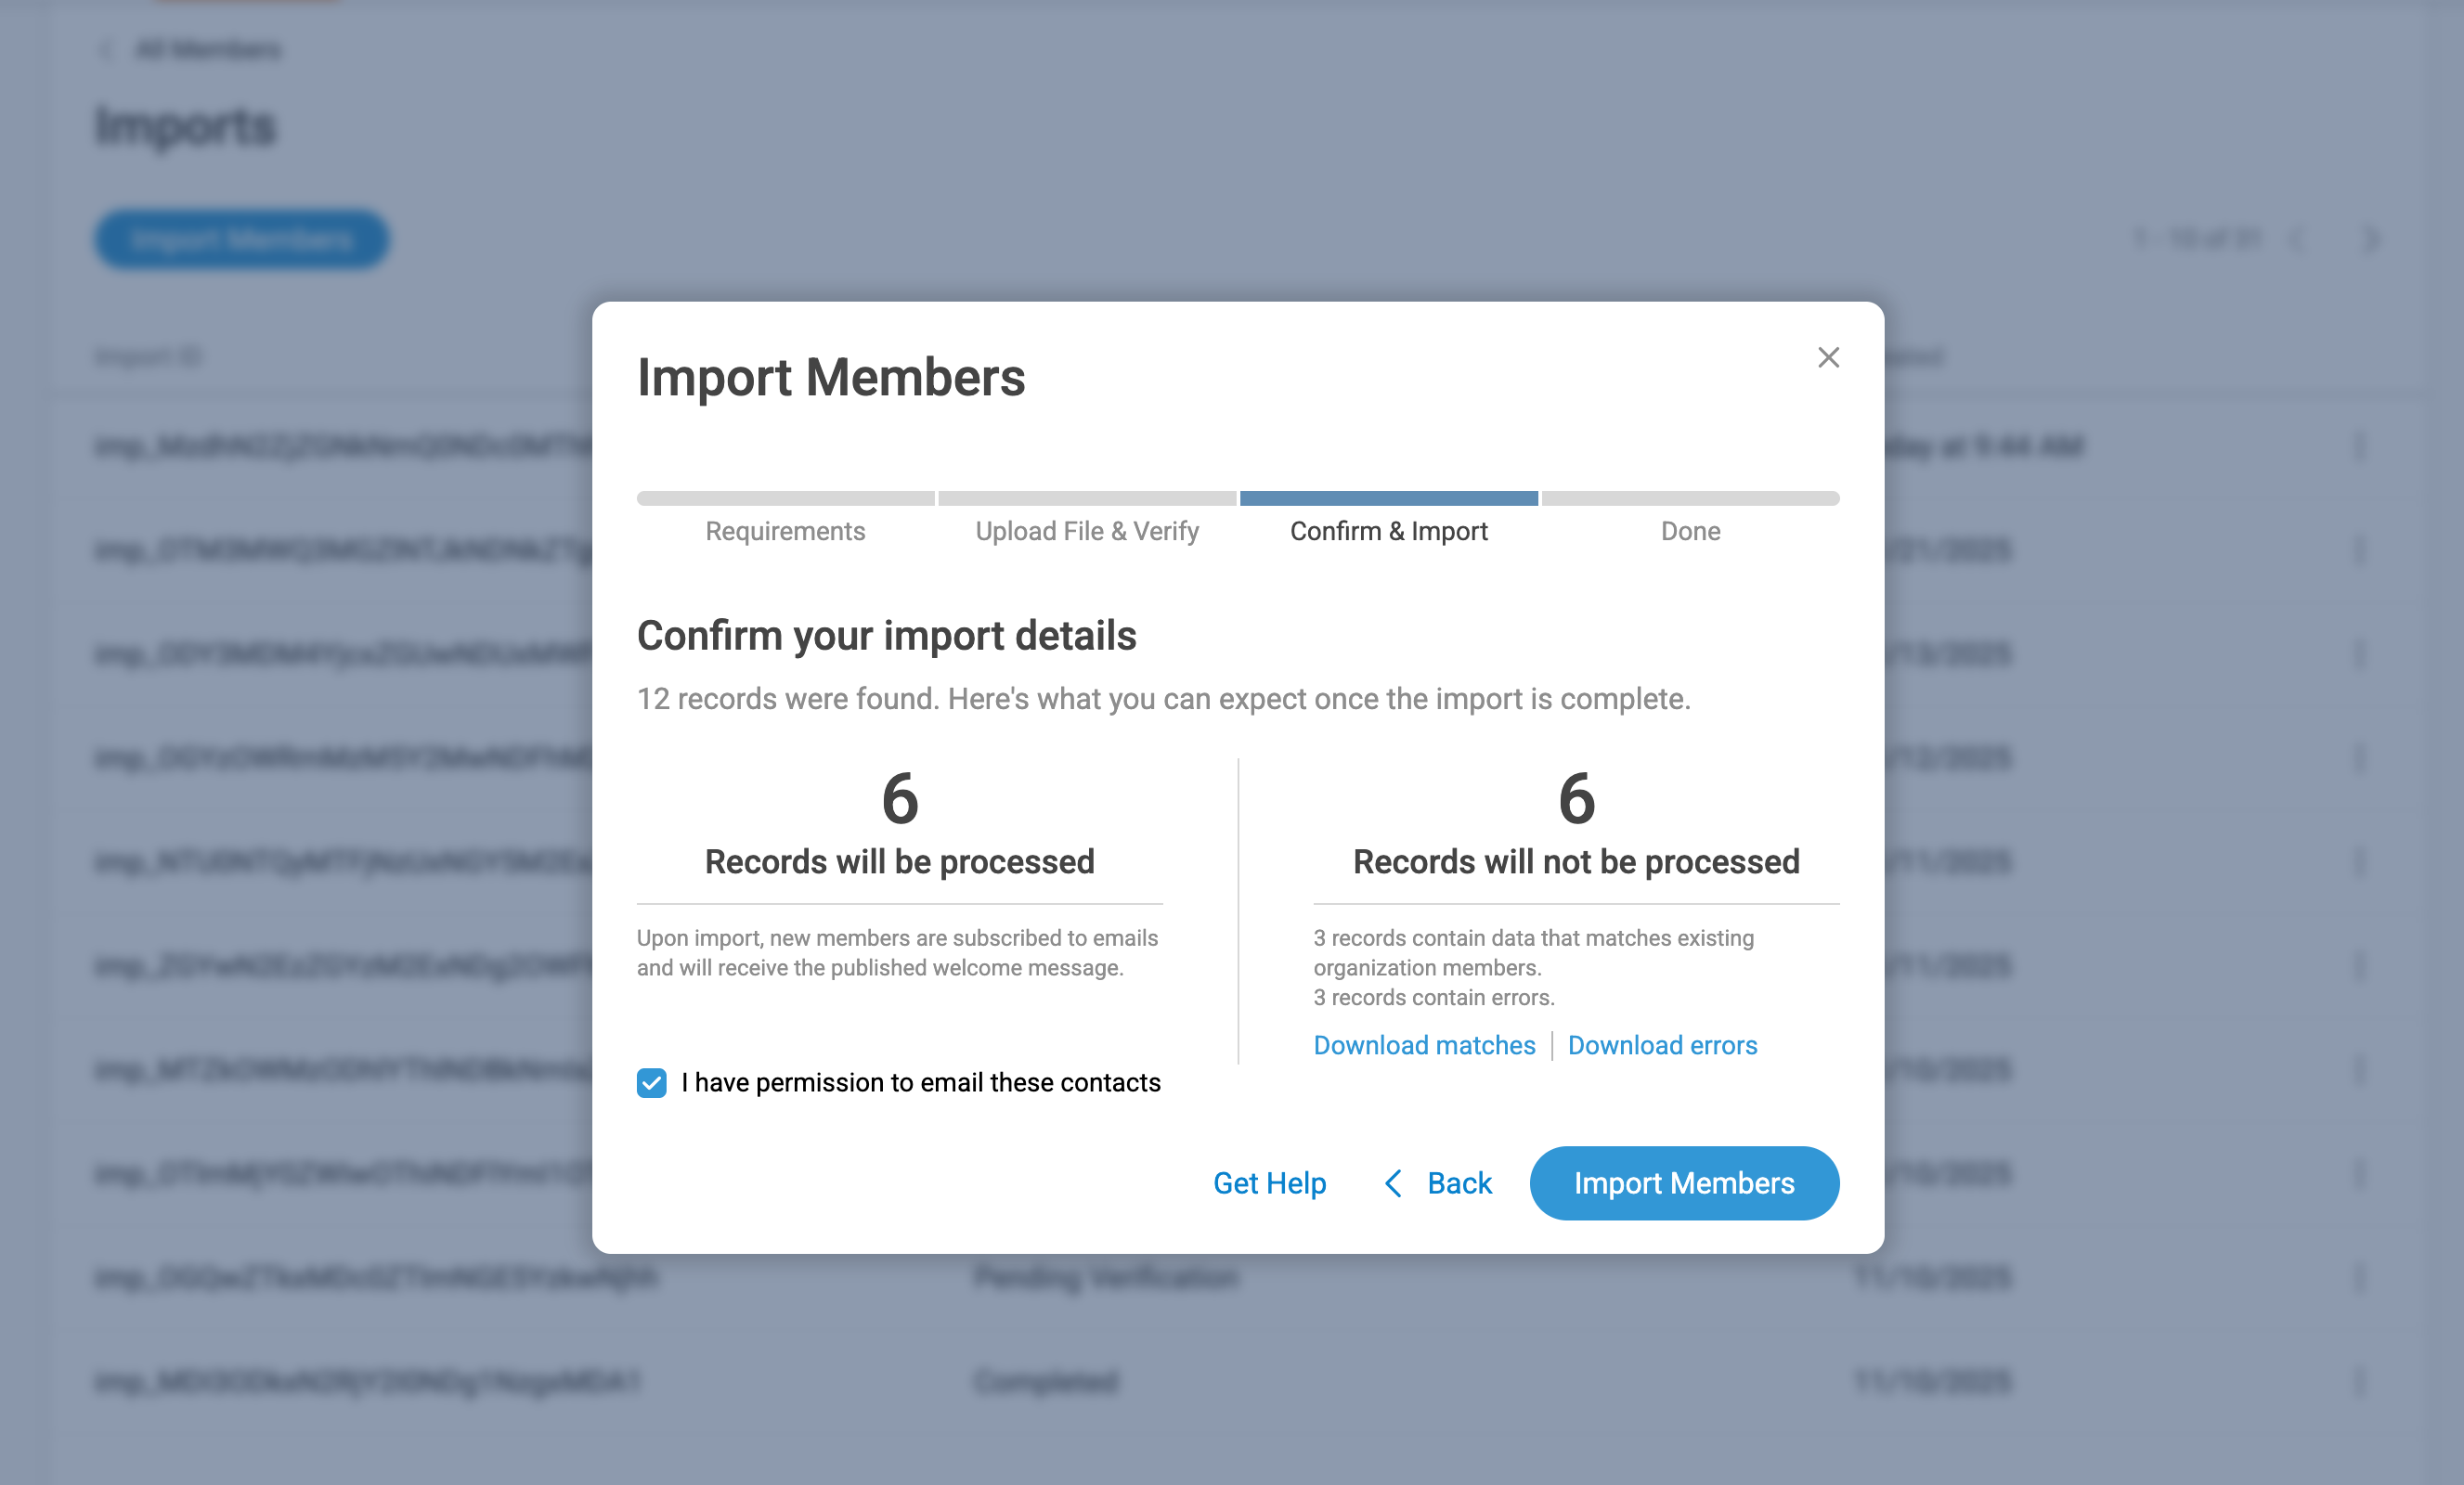
If errors or matches are found, you may click Download matches and/or Download errors to get a list of records that will not be processed alongside additional information.
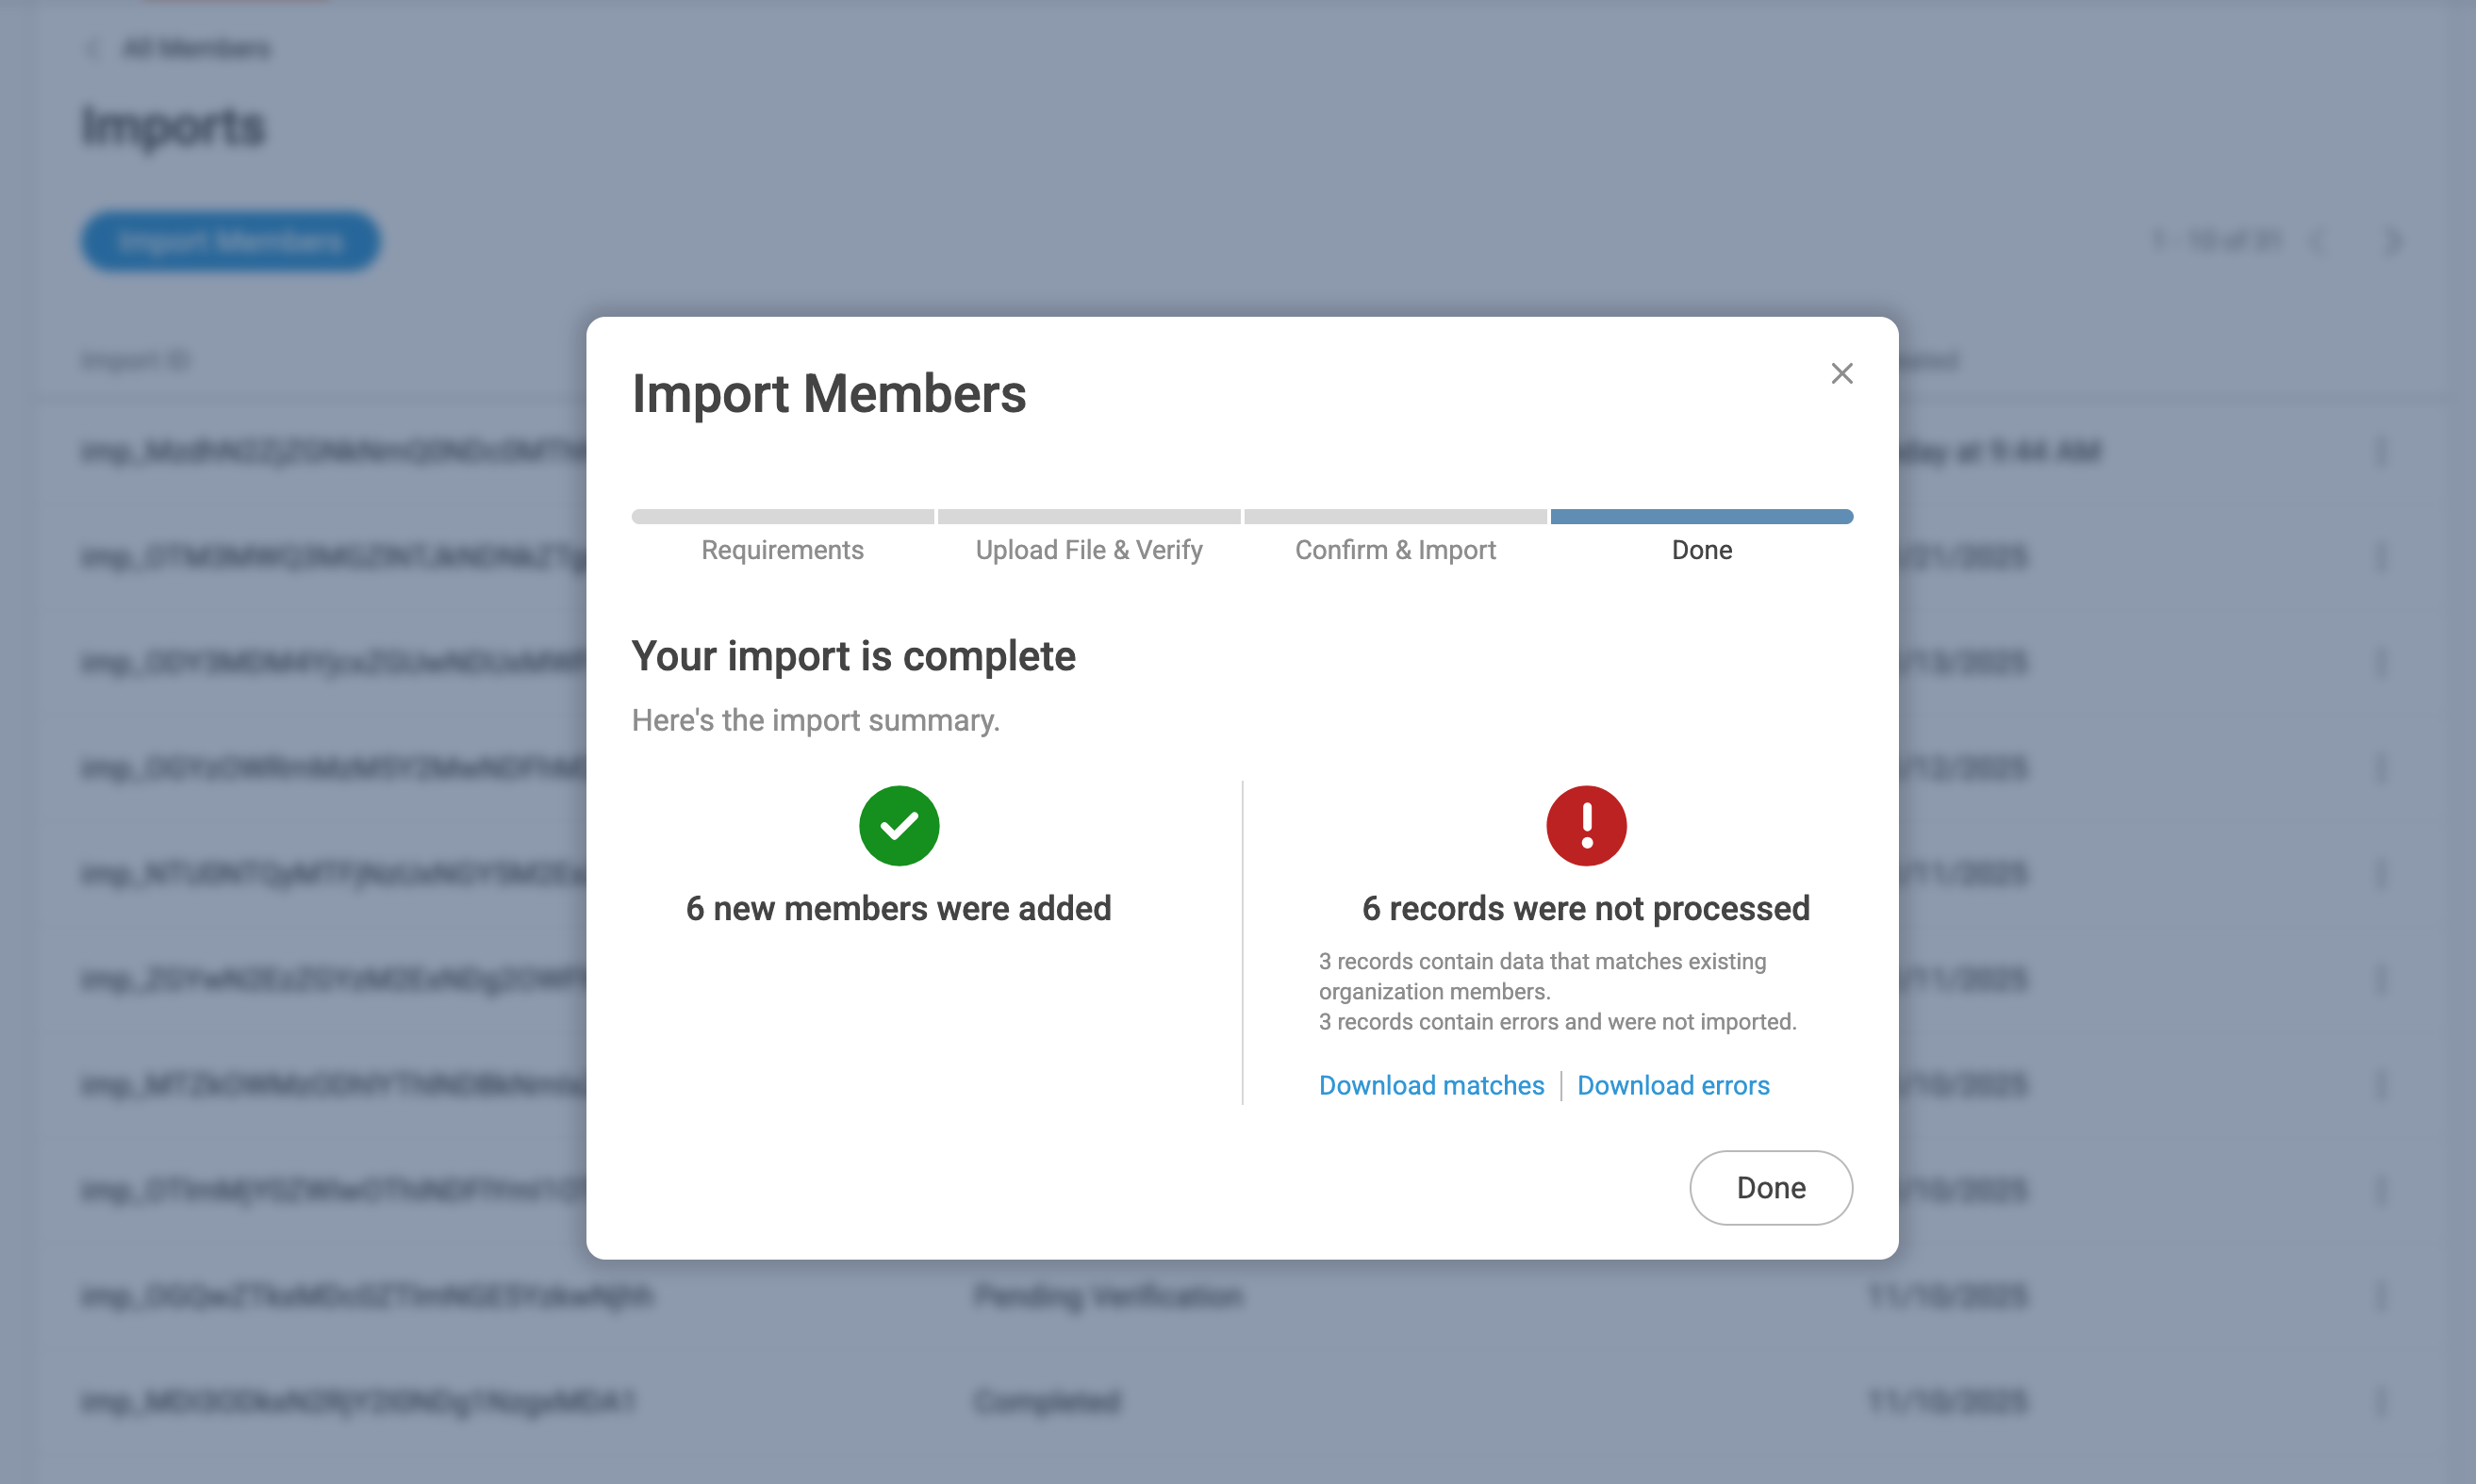
4 - Import Summary - After your import is complete, you will see a summary screen that details the number of members added as well as any records not added. Once finished, click Done.
What to expect after your import
After the import is complete:
- All imported members are automatically subscribed to receive email messages from your organization and the groups they are added to.
- All imported members will receive the published organization welcome message. If the welcome message hasn't been published yet, they will receive it once it is published.
Getting members subscribed to text messages
If your organization has activated texting, imported members will not be automatically subscribed to receive text messages from your organization and its groups.
In order to send text messages, your organization needs members to:
- Provide a valid mobile number that can receive texts.
- Opt in to receive text messages.
Connect makes it simple for your organization to invite members to subscribe to receive your text messages and obtain the required permission to send texts. Check out Inviting members to subscribe to text messages for more information.
Suggested next steps after your import
Once your import is complete, here are some suggested next steps that will help you get up and running quickly with Connect.
- Import members into groups
- Publish your welcome message
- Invite members to subscribe to text messages
- Send a message
Need help with your import?
If you are having trouble, our team is happy to help get your member data imported into Connect. Either click the Get help button in the import workflow or attach and send your CSV file to [email protected] and let us handle the import for you!
Import FAQs
Why do I need to indicate I have permission to email members I import?
The import feature is designed to quickly and easily add existing members from a different communication system into Connect. As a result, you should only import members that you have previously received explicit permission to email.
If you want to add someone that you do not have explicit permission to email, use the Invite a member workflow instead. This will ensure that your messages don’t get marked as spam. Having members mark your messages as spam ultimately harms your sending reputation and email deliverability.
What happens after members are imported?
Members added via import:
- Are automatically subscribed to receive email messages from your organization and the groups they are added to (no opt-in required).
- Will receive the published organization welcome message. If the welcome message hasn't been published yet, they will receive it once it is published.
What admins see:
- Each imported member is added to your organization with the Joined status. This means you will be able to see each member on the Members screen.
- Each imported member is also automatically added to the ‘All Members’ group. This means you can email them anytime you use the ‘Email All Members’ feature. You may also add them to other groups in your organization, and they will receive group messages.
What members see:
After you complete your import, all imported members will receive your welcome message. The welcome message lets your members know that they have been added to your organization and will now be able to receive messages you send to all members.
Related: Bulk add group members via CSV
Importing organization members is the recommended first step to move your members from another system into Connect. Then, you can also import members directly into a group to set up groups with many members quickly and easily.